
Shopify has become one of the top eCommerce Platforms to support running a business. As more enterprises use Shopify’s platform, the need for customization increases. You can use a default Shopify template, however, customizing a template will make your business stand out. And as expert Shopify developers, that’s exactly what we like to do. so let’s start how can you create Custom Carousel for Shopify Using Slick Slider
Having a slider for the product page is one of those customizable elements.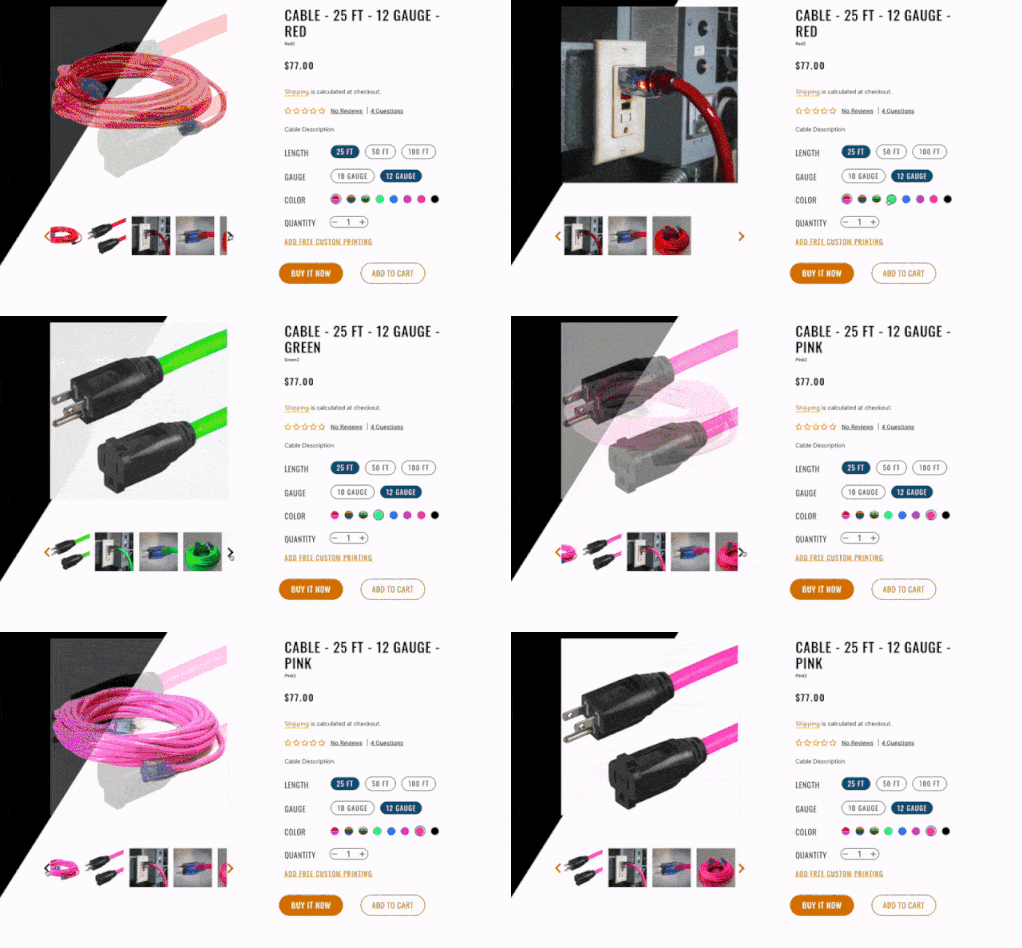
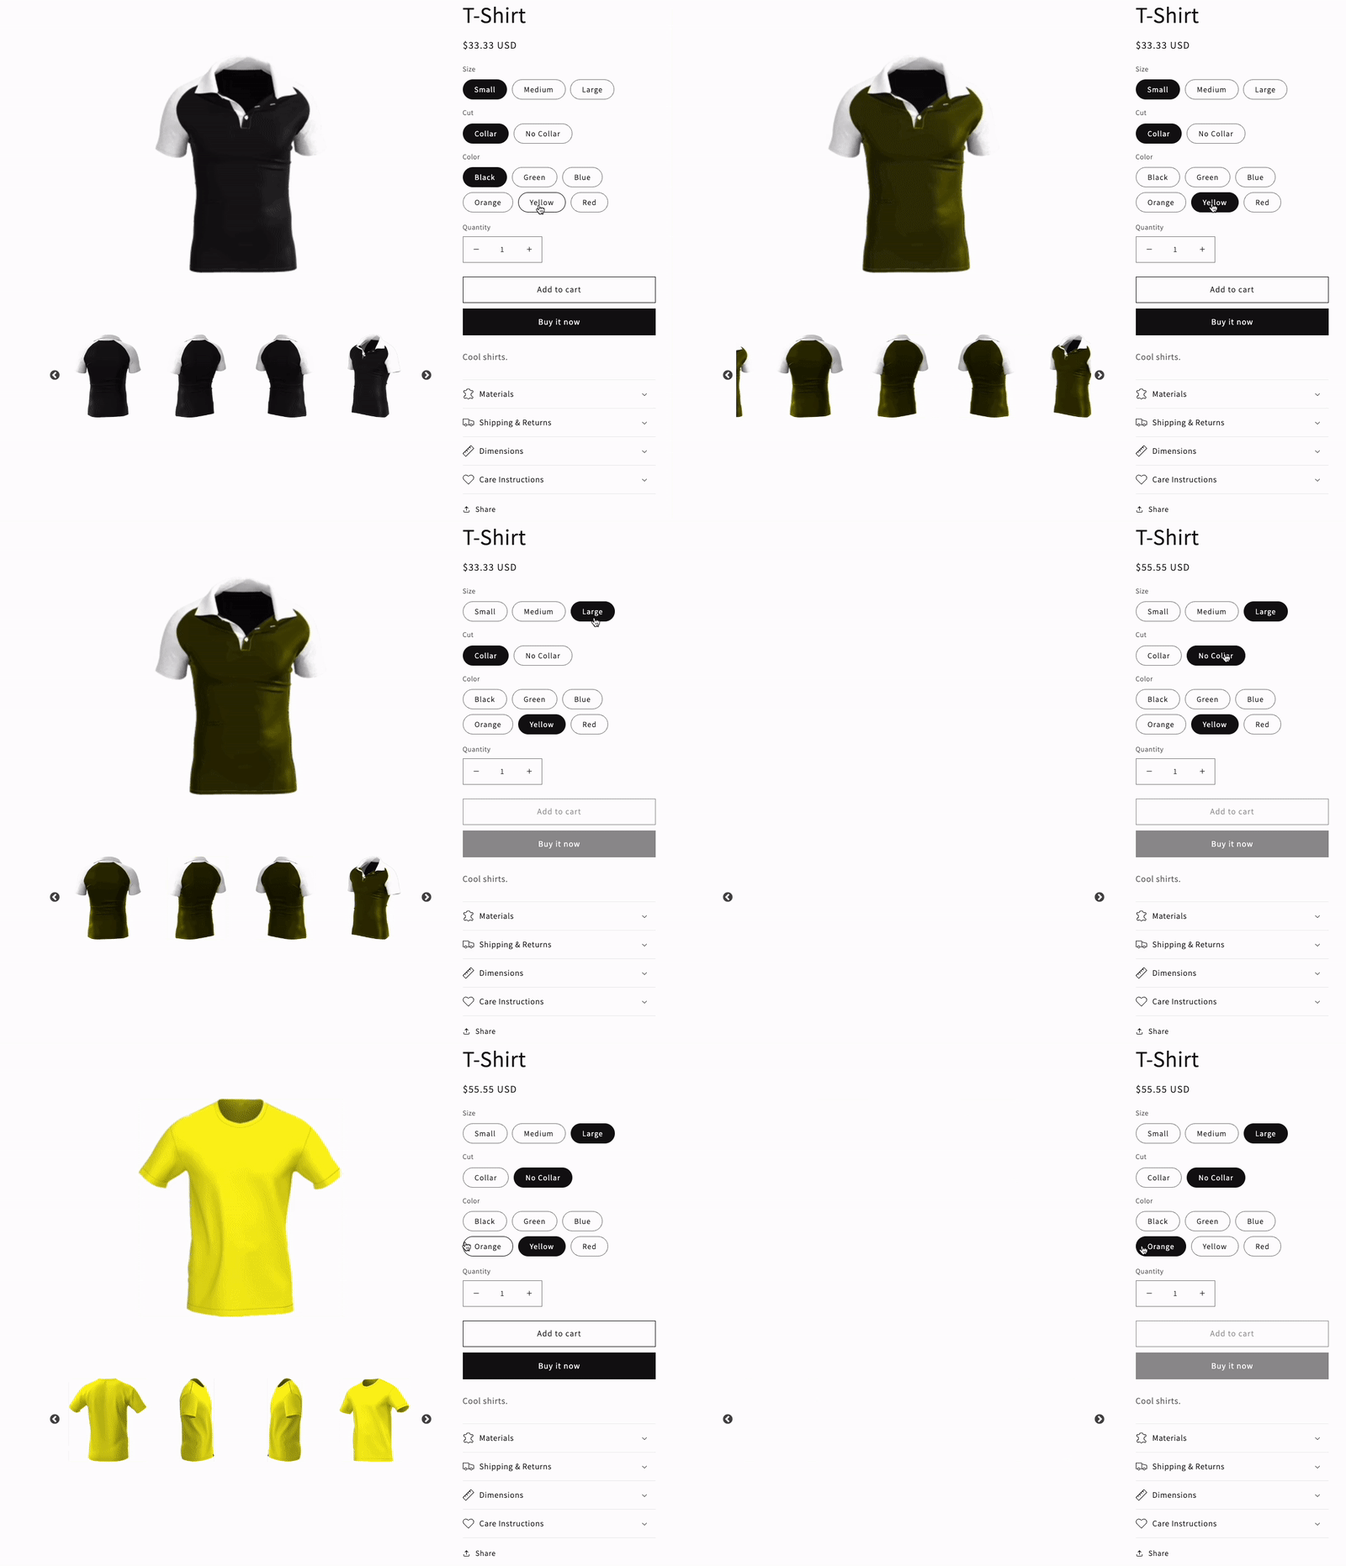
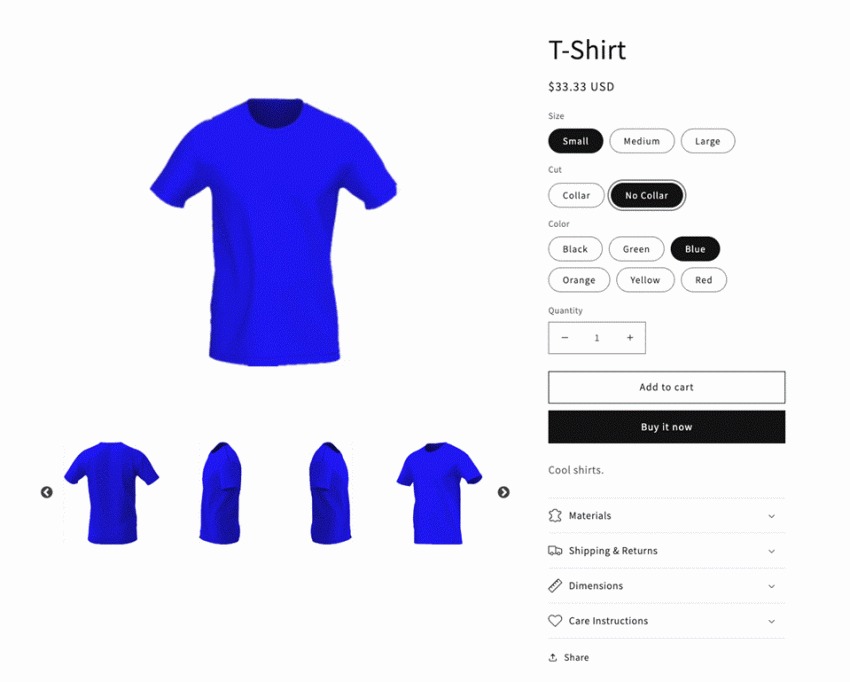
Recently, we used Shopify’s Dawn theme on a client project and heavily modified it, making it almost unrecognizable from the Dawn basic theme. Our team challenged itself to create a slider that would show the main product feature image (and main variant images) with a group of thumbnail images below it that also had the capability of sliding. Essentially two sliders would be needed with the ability to filter simultaneously to match the Shopify option variant choice that was clicked on.
This tutorial strips everything back to Dawn’s bare bones to show the solution to our challenge (see figure below), in addition to a product add with variants, options, and images. Please see this link if you don’t know how to add a product with variants and options.
LET’S START
Log in to your Shopify store.
Ensure that your Shopify store is backed up. You can either follow Shopify’s help document about backing up your store here or use one of the many available apps that creates a backup for you here.
Next, we need the Slick Carousel files and jQuery. Find the latest CDN for Slick found here as well as the latest stable release of jQuery CDN found here. (If you’re using Shopify’s CLI, Shopify’s ‘theme-check’ may yell at you for using a CDN — we’re using it for the sake of this tutorial. However, it is highly recommended to look into alternative methods of including Slick and jQuery—like packaging it up with npm).
[Optional CDN: Bootstrap was installed for the styles.]
Copy the Slick and jQuery CDN snippets.
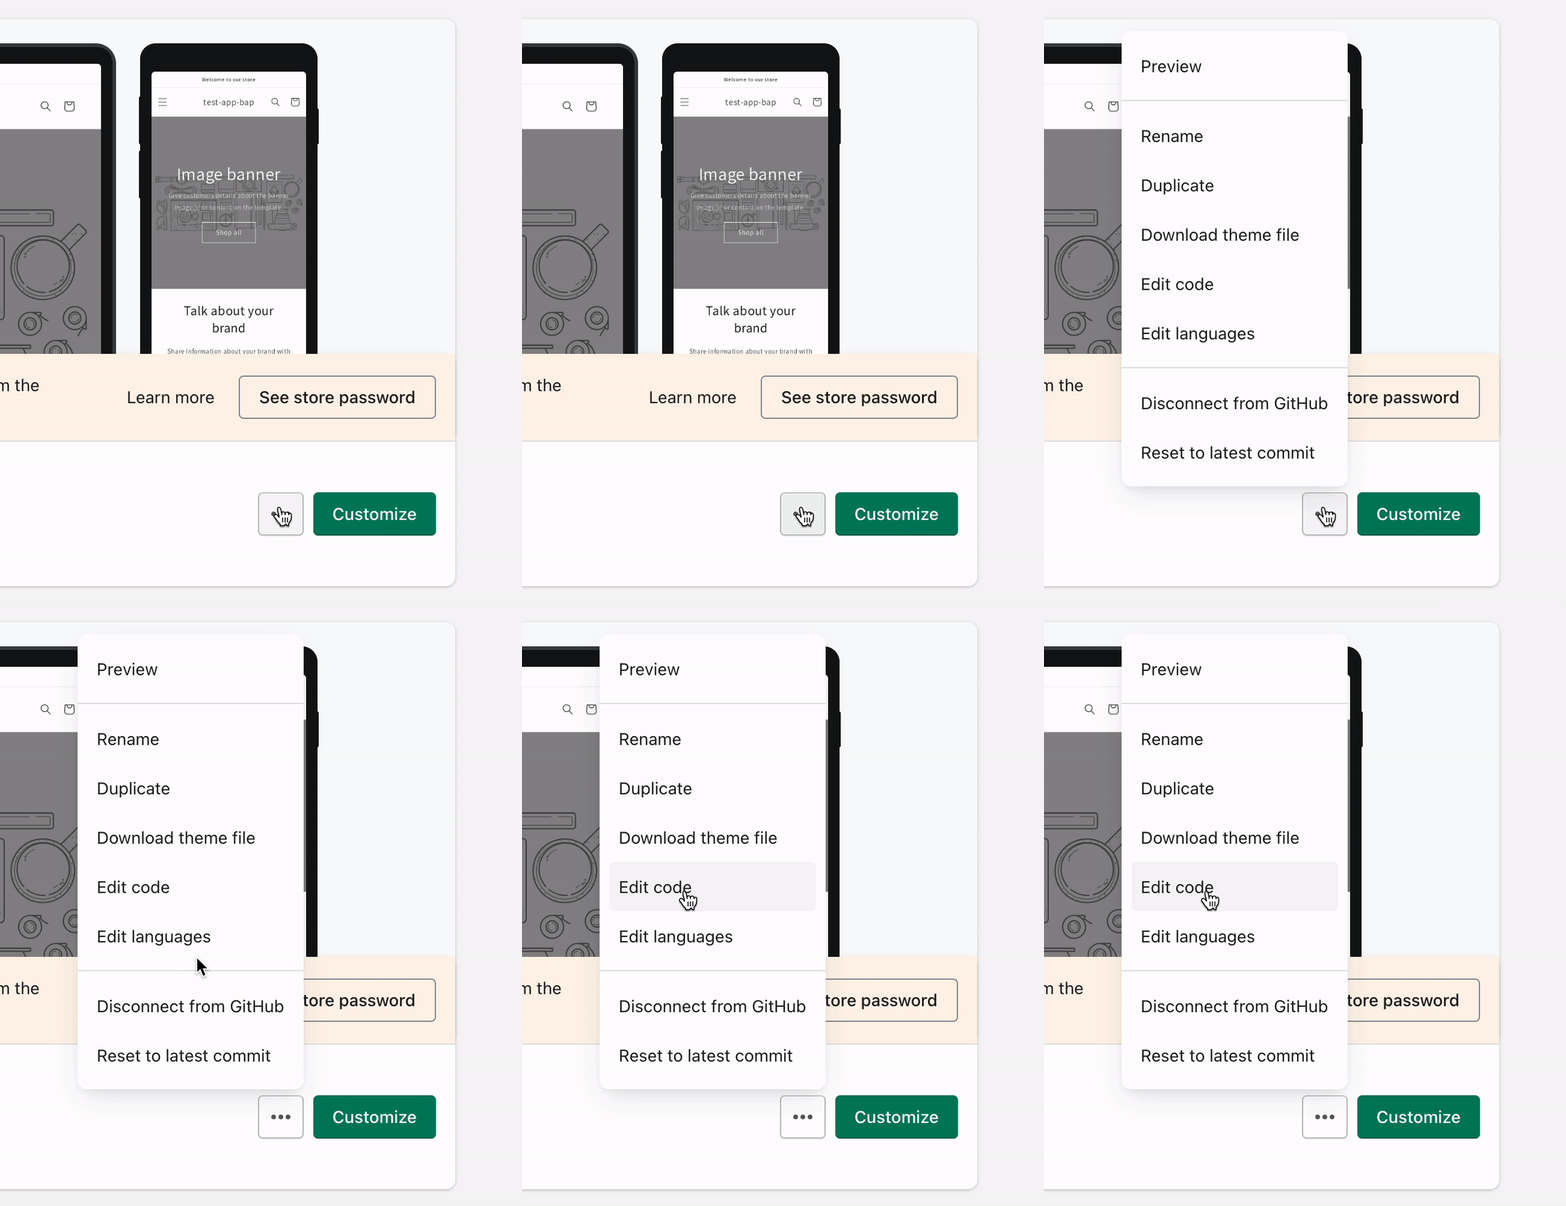
On the left side menu, locate ‘Sales channels’ and select ‘Online Store’. A drop-down will appear, and ‘Themes’ should automatically be selected and highlighted; if not, click on ‘Themes’. The main browser window should reload with your Themes information on the right side.
Find and select the ellipsis (the ‘…’) next to the ‘Customize’ button. A drop-down menu will appear. Select ‘Edit code’.
This is where we will edit all code items going forward.
Locate the ‘Layout’ folder and select ‘theme.liquid’.
When ‘theme.liquid’ loads on the right side of your window scroll down to line 32.
Paste the two CDN snippets above line 32.
Above:
<script src="{{ 'global.js' | asset_url }}" defer="defer"></script> |
Press ‘Save’.
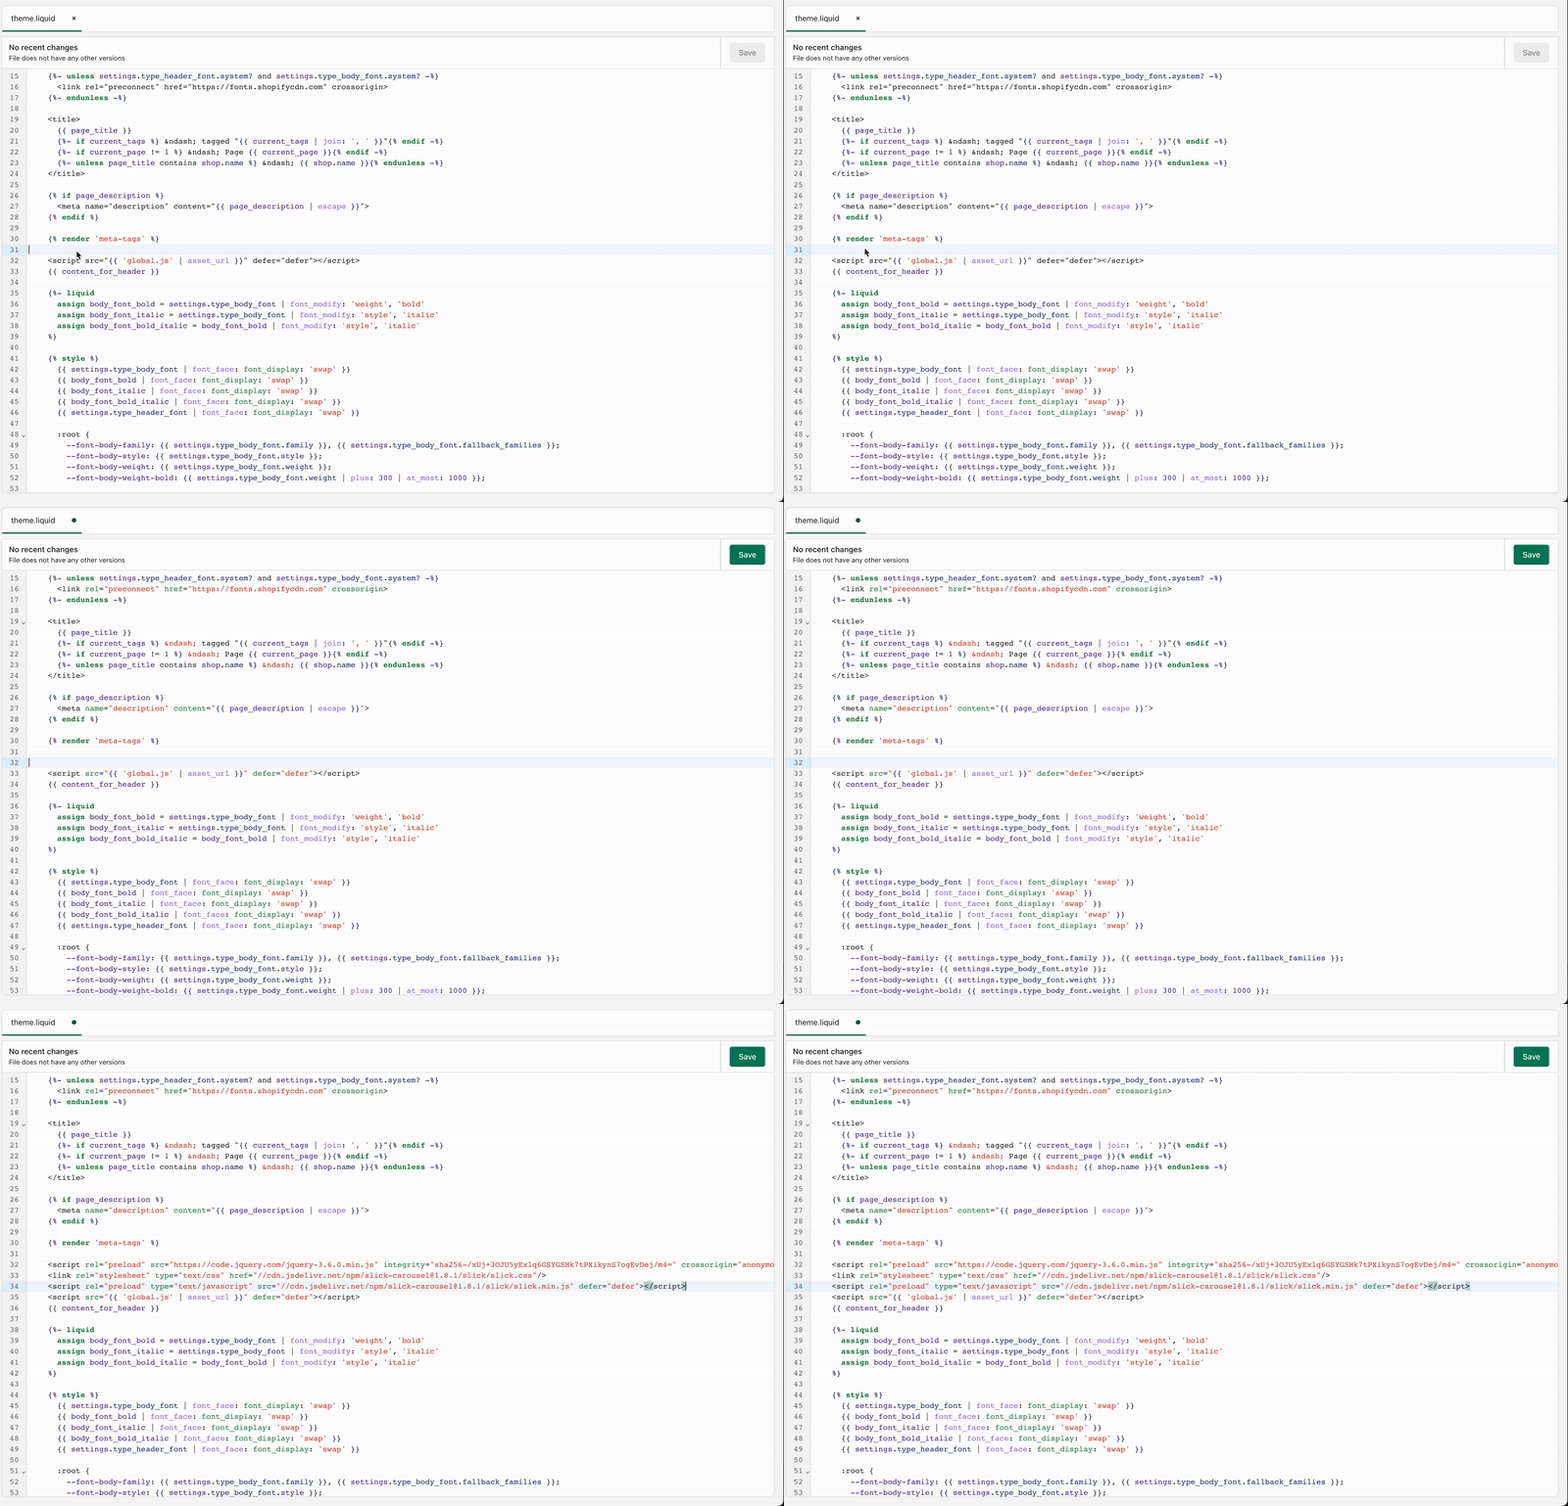
The above example does not include the Slick Theme CDN or Bootstrap CDN. For this tutorial, both CDNs were used. They’re both optional but could give you a head start in styling your carousel/slider.
SET UP PRODUCT TEMPLATE FILE
Back on the left side menu, located under the ‘Sections’ folder, find ‘main-product.liquid’ and open it. This is Dawn’s default product template for all products. We preemptively are adding our file and script paths and will create the corresponding files afterward.
SLICK & WEB COMPONENTS API
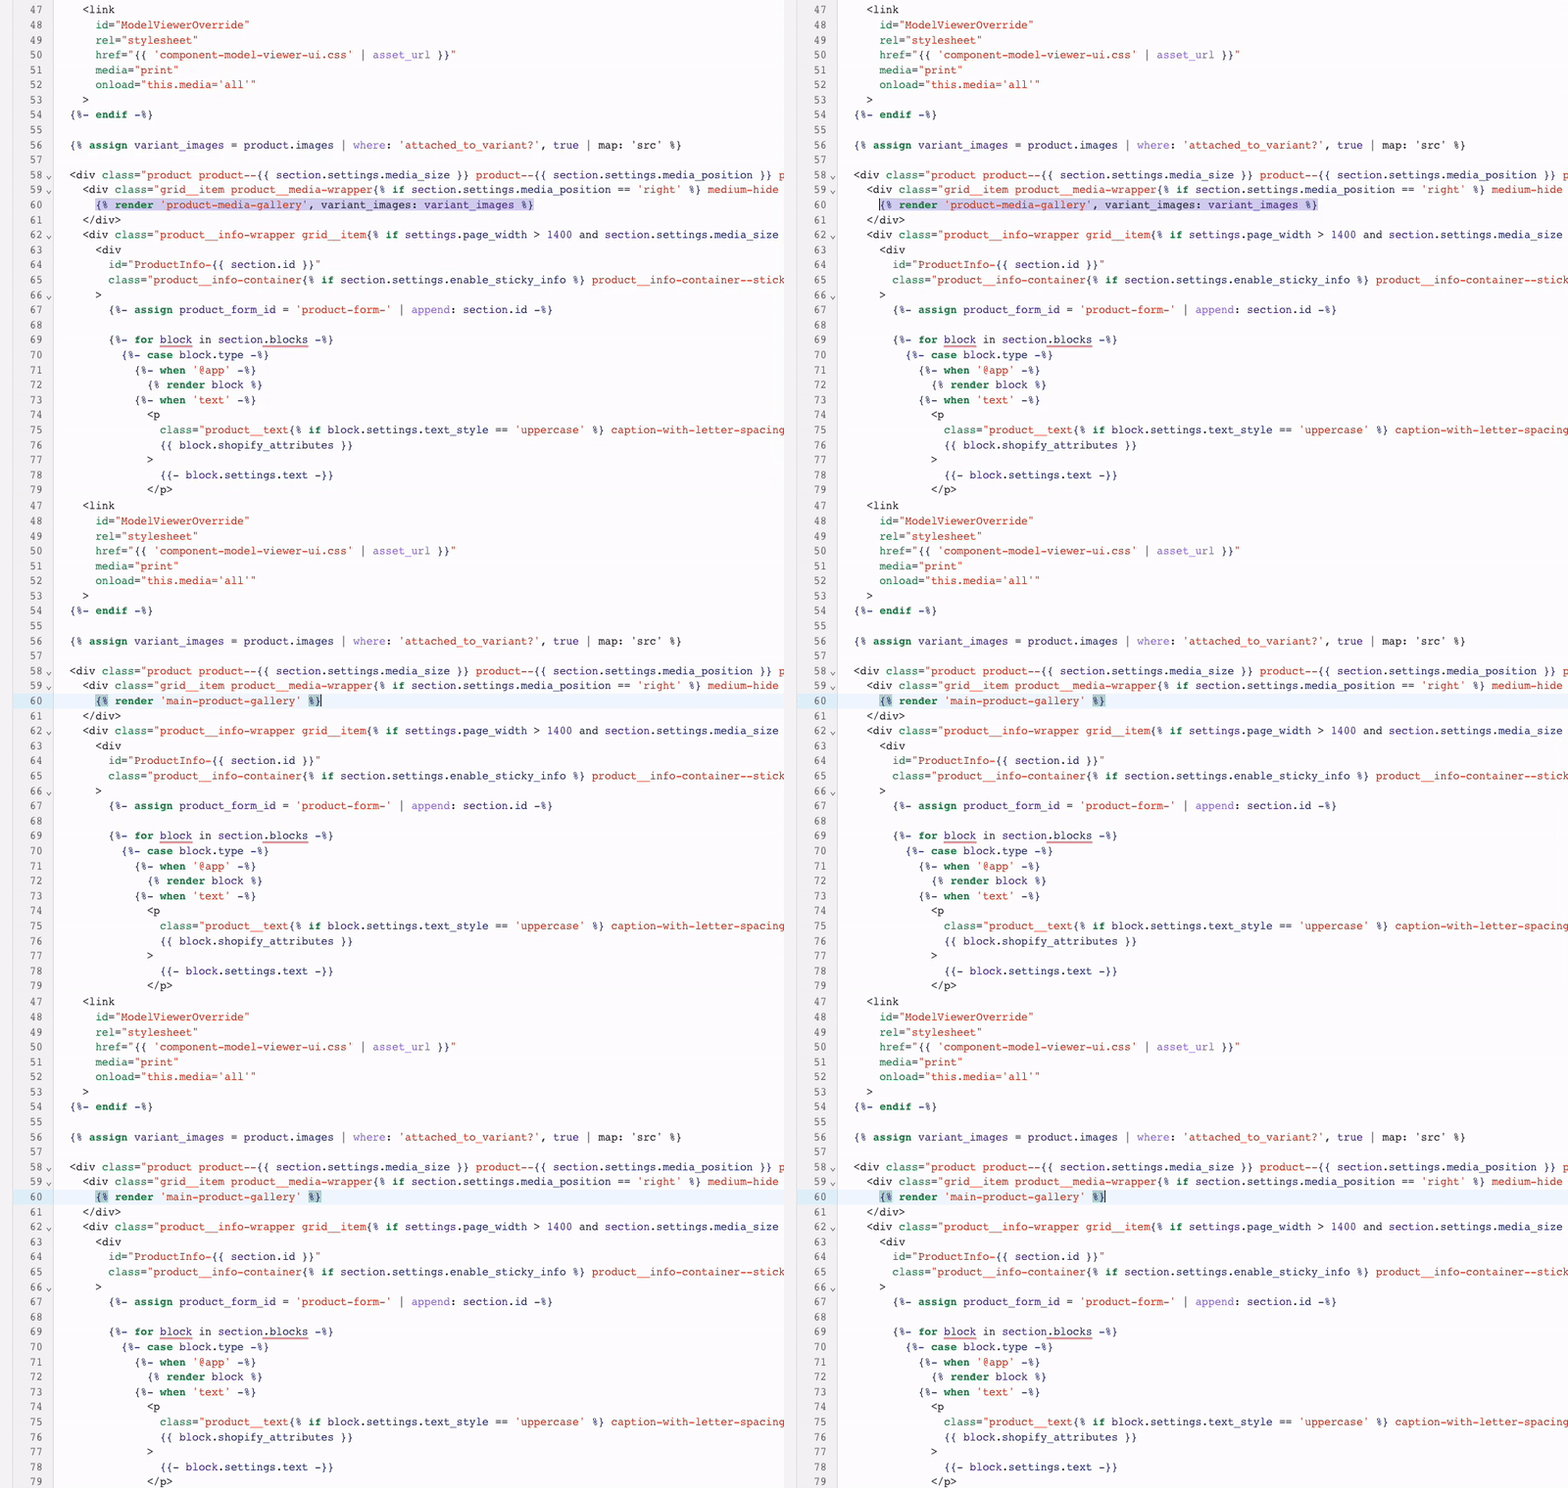
On line 60, change:
{% render 'product-media-gallery', variant_images: variant_images %} |
with:
{% render 'main-product-gallery' %} |
{% render ‘filename’ %} is the liquid tag we will use to output dynamic content into our template. We deleted the ‘variant_images: variant_images’ because we do not need to pass any variables through our render tag.
JS
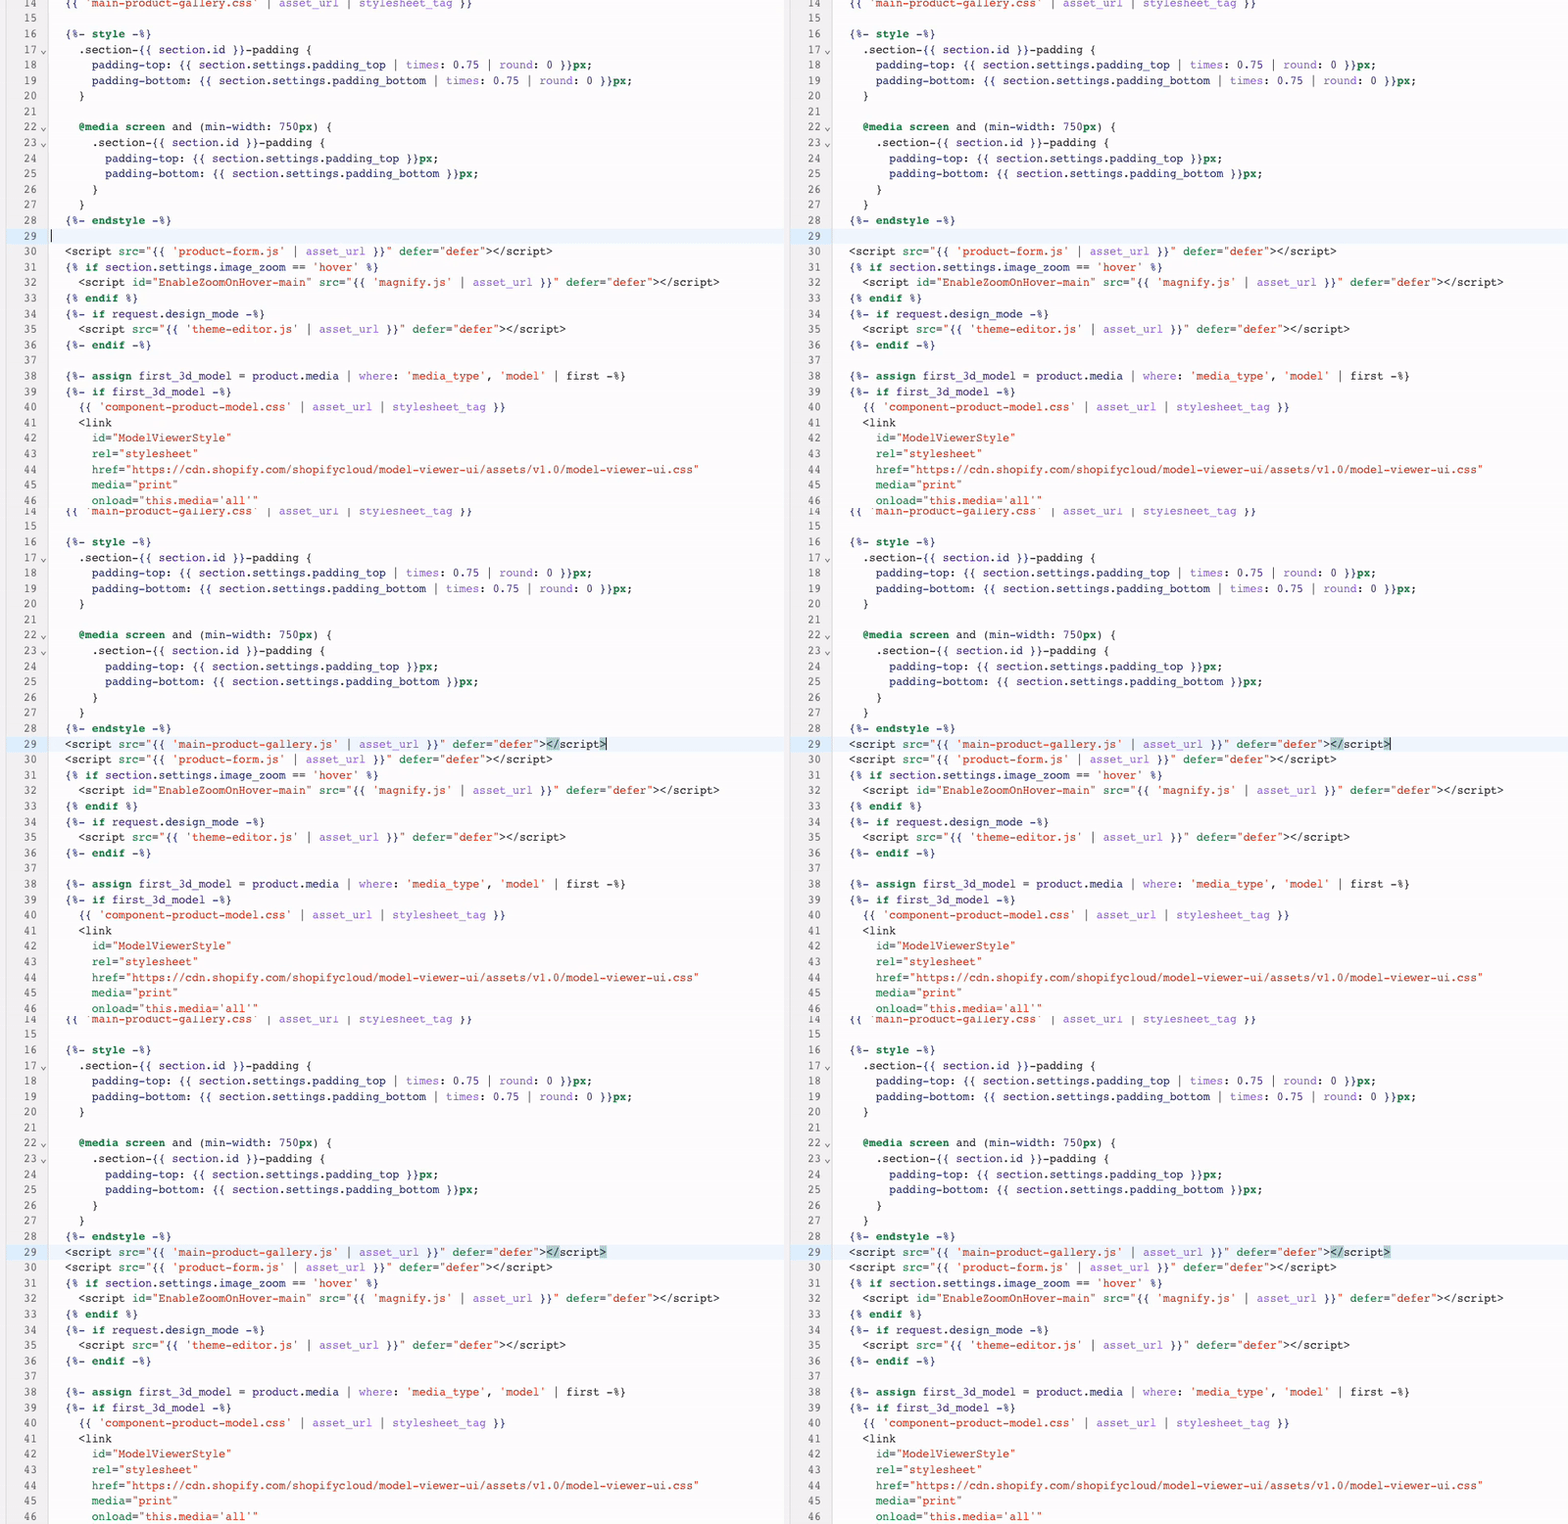
Go to line 30 and find the following:
<script src="{{ 'product-form.js' | asset_url }}" defer="defer"></script> |
Above it on line 29, add:
<script src="{{ 'main-product-gallery.js' | asset_url }}" defer="defer"></script> |
CSS
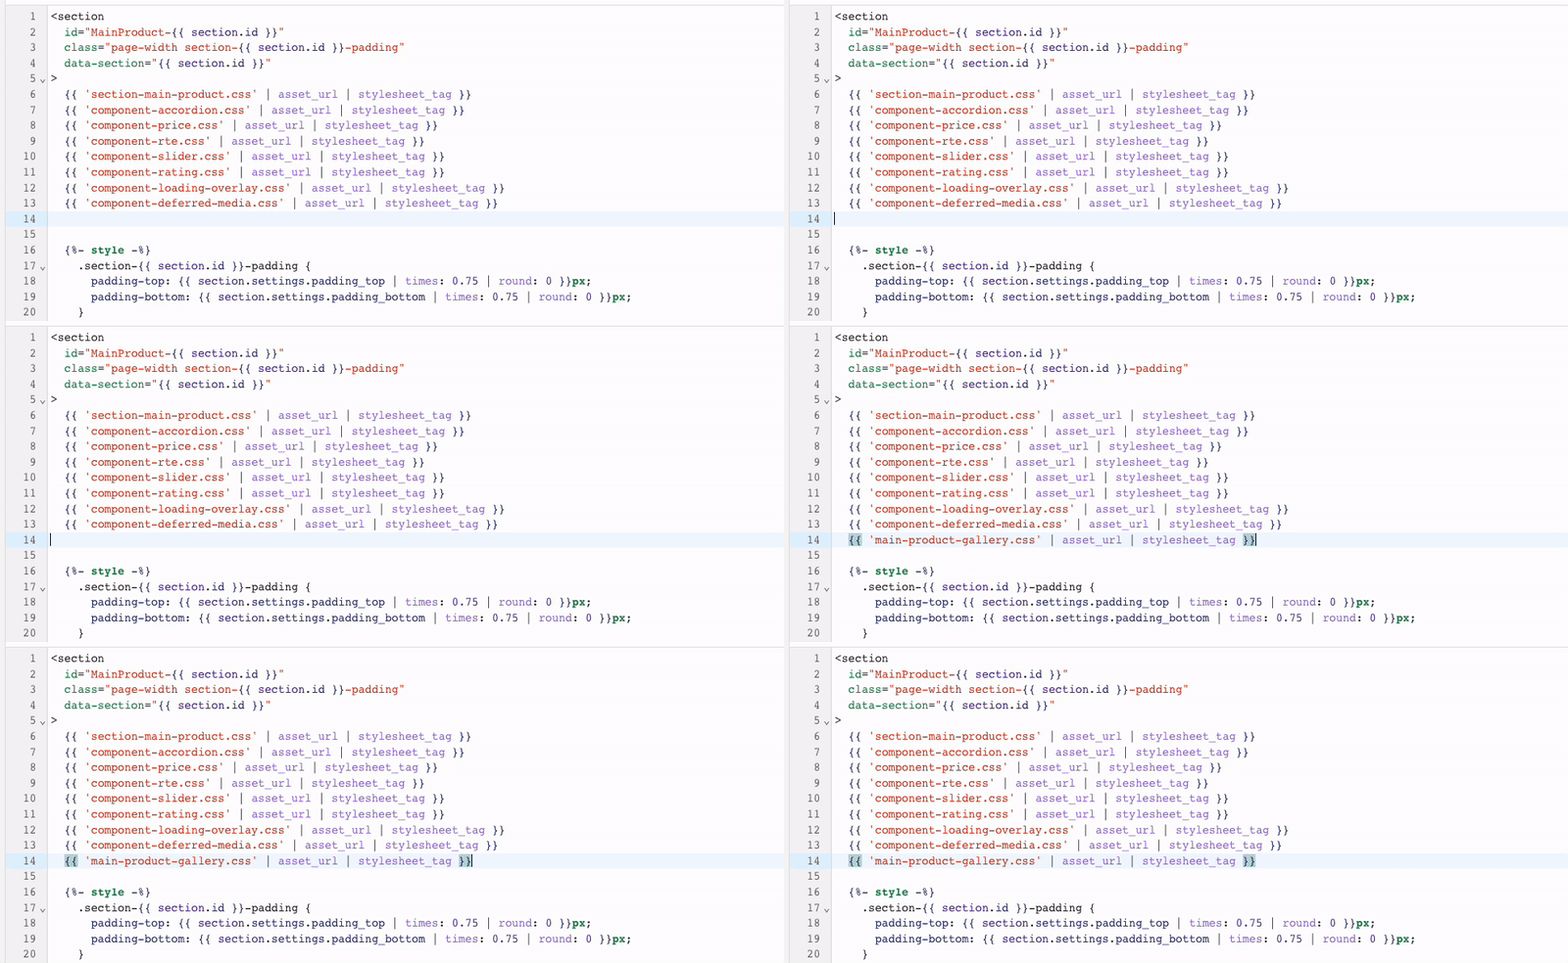
Finally, scroll up to line 13 to find:
{{ 'component-deferred-media.css' | asset_url | stylesheet_tag }} |
Below it on line 14, add:
{{ 'main-product-gallery.css' | asset_url | stylesheet_tag }} |
Save your file.
CREATING OUR FILES
Now we will leverage Dawn’s web components API alongside Slick carousel.
CREATE YOUR GALLERY FILE
WEB COMPONENTS & SLICK
Find the ‘Snippets’ folder. Select ‘Add a new snippet’. We’re going to create a file called ‘main-product-gallery.liquid’. Type in ‘main-product-gallery’ into the text box and hit ‘Done’. (We do not need ‘liquid’ as it will automatically be added.)
Paste this code into our newly created ‘main-product-gallery.liquid’ and hit Save.
<main-product-gallery class="main-product-gallery"><div class="main-product-gallery__images-wrapper"><div id="slick" class="slick main-product-gallery__images">{%- for media in product.media -%}<div class="main-product-gallery__image{% if media.id == product.selected_or_first_available_variant.featured_media.id or product.media.size == 1 %} main-product-gallery__image--active{% endif %}" data-media-id="{{ media.id }}">{% render 'product-thumbnail', media: media %}</div>{%- endfor -%}</div></div>{% if product.images.size > 0 %}<div class="main-product-gallery__thumbnails-wrapper"><div id="slick-thumbnails" class="slick-thumbnails main-product-gallery__thumbnails">{%- for media in product.media -%}<div class="main-product-gallery__thumbnail{% if media.id == product.selected_or_first_available_variant.featured_media.id or product.media.size == 1 %} main-product-gallery__image--active{% endif %}" data-media-id="{{ media.id }}">{% render 'product-thumbnail', media: media %}</div>{%- endfor -%}</div></div>{% endif %}</main-product-gallery> |
The code we used above is our Web Components wrapper with the two Slick Sliders on the inside. The main slider is declared with the id=”slick” and our thumbnail slider with id=”slick-thumbnails”. We’re using Dawn’s product-thumbnail snippet to render our images.
CREATE YOUR JS FILE
Next, under the ‘Assets’ folder, we are going to ‘Add a new asset’ and ‘Create a blank file’. Under the dropdown ‘Extension’, select ‘js’. Add ‘main-product-gallery’ in the file name text box. Hit ‘Done’.
We’re going to wrap our js code with:
$(()=> {}) |
Paste the code between {}.
There are going to be three areas on which we’ll focus.
VARIABLES
Let’s start by declaring our variables and defining our first slider carousel for the larger single-feature image.
let $component = $('.main-product-gallery')if(!$component.length) { return }let $mpSlick = $('#slick'),$mpThumbnails = $('#slick-thumbnails'),$mpSlideButton = $('.main-product-buttons input.mp-radio') |
ADD MAIN SLIDER AND THUMBNAIL SLIDER
Now add in our Slick. This section is where both sliders will communicate with each other.
if($mpSlick.length) {$mpSlick.slick({infinite: true,dots: false,arrows: false,fade: true,autoplay: false,swipe: false,touchMove: false,centerMode: true,variableWidth: false,slidesToShow: 1,slidesToScroll: 1,swipeToSlide: false,draggable: false})if($mpSlick.find('.main-product-gallery__image--active').length) {let mpSlickIndex = $mpSlick.find('.main-product-gallery__image--active').data('slick-index')$mpSlick.slick('slickGoTo', mpSlickIndex)}}if($mpThumbnails.length){$mpThumbnails.slick({asNavFor: '#slick',infinite: false,dots: false,arrows: true,autoplay: false,slidesToShow: 4,slidesToScroll: 1,centerMode: false,mobileFirst: false,variableWidth: false,adaptiveHeight: false,focusOnSelect: true,responsive: [{breakpoint: 1200,settings: {slidesToShow: 4,slidesToScroll: 1,}},{breakpoint: 992,settings: {slidesToShow: 4,slidesToScroll: 1,}},{breakpoint: 768,settings: {slidesToShow: 2,slidesToScroll: 1}},{breakpoint: 576,settings: {slidesToShow: 2,slidesToScroll: 1}},]})if($mpThumbnails.find('.main-product-gallery__image--active').length) {let mpSlickThumbnailIndex = $mpThumbnails.find('.main-product-gallery__image--active').data('slick-index')$mpThumbnails.slick('slickGoTo', mpSlickThumbnailIndex)}} |
ON CLICK EVENT
In the end, add our click function.
$mpSlideButton.on('click', function(e){setTimeout(function(){if($mpSlick.find('.main-product-gallery__image--active').length) {let mpSlickIndex = $mpSlick.find('.main-product-gallery__image--active').data('slick-index')$mpSlick.slick('slickGoTo', mpSlickIndex)}if($mpThumbnails.find('.main-product-gallery__image--active').length) {let mpSlickThumbnailIndex = $mpThumbnails.find('.main-product-gallery__image--active').data('slick-index')$mpThumbnails.slick('slickGoTo', mpSlickThumbnailIndex)}}, 500)}) |
This is setting up the click function. Save.
A FEW THINGS TO NOTE:
If you do not want your thumbnails to show the main image first when a user selects one of your variable options, find $mpThumbnails.slick(‘slickGoTo’, mpSlickThumbnailIndex) and add [+ 1] next to mpSlickThumbnailIndex.
Adding a ‘+ 1’ will tell the slide to skip over the main image.
An attempt was made to implement both sliders using both functions due to Slick’s “filter” and “unslick” usage settings. Initially, the filtering and unslick settings were successfully used. However, when the code was implemented alongside Shopify’s frameworks, too many complications popped up (like dealing with unavailable products or products being inputted differently for the same item). Trying to account for all these variables while grabbing a variant’s three options still meant many failed attempts. This was solved by implementing a web component element.
But if you wanted to tread further into the unknown and implement sliders with slick’s filtering settings and work with Shopify’s constraints, maybe this code, where I stopped, will help you on your journey:
function getFilterValue() {var values = $('.main-product-buttons').map(function() {var groupVal = $(this).find('input:checked').map(function() {return $(this).val().replaceAll(" ", "").toLowerCase().trim().replaceAll(" ", "").replaceAll("&", "").replaceAll("amp", "").replaceAll("-", "").replaceAll("/", "").replaceAll("and", "").replaceAll(",", "").replaceAll("small", "").replaceAll("medium", "").replaceAll("large", "");}).get();return groupVal.join(',');}).get();return values.filter(function(n) {return n !== "";}).join('');}var filter = getFilterValue();var key = "." + filter; |
CREATE YOUR CSS FILE
NEXT, LET’S ADD OUR CSS.
Add another blank file asset, except this time select ‘css’ as the extension. Enter ‘main-product-gallery’ and click ‘Done’. This is where some of the optional files can come into play.
Paste and save:
.main-product-gallery .product__media-icon {display: none;}.main-product-gallery .main-product-gallery__images {display: flex;flex-direction: column;height: 610px;justify-content: center;}.main-product-gallery .main-product-gallery__images .product-media-container {display: flex;justify-content: center;width: 100%;}.main-product-gallery .main-product-gallery__images .product-media-container.global-media-settings {border: unset;}.main-product-gallery .main-product-gallery__images .product-media-container .product__modal-opener {width: 390px;}.main-product-gallery .main-product-gallery__thumbnails-wrapper {margin: 0 10px;}.main-product-gallery .main-product-gallery__thumbnails-wrapper .main-product-gallery__thumbnails {margin: 0 30px;}.main-product-gallery .main-product-gallery__thumbnails-wrapper .main-product-gallery__thumbnails .main-product-gallery__thumbnail {margin: 0 5px;}.main-product-gallery .main-product-gallery__thumbnails-wrapper .main-product-gallery__thumbnails .main-product-gallery__thumbnail .product-media-container {border: unset;}.main-product-gallery .slick-slider .slick-prev::before,.main-product-gallery .slick-slider .slick-next::before {color: #000;} |
PRODUCT OPTIONS
MAIN-PRODUCT.LIQUID
In sections/main-product.liquid, search for variant-picker.
[Mac ⌘+ F | PC Ctrl + F (Click inside the code window frame–so you don’t trigger your browser’s search)].
Between the {%- when ‘variant_picker’ -%} control flow block find:
{%- for option in product.options_with_values -%}<fieldset class="js product-form__input"><legend class="form__label">{{ option.name }}</legend>{% render 'product-variant-options',product: product,option: option,block: block%}</fieldset>{%- endfor -%} |
We are going to wrap the liquid render tag in a div tag with a class attribute ‘main-product-buttons’. Save.
<div class="main-product-buttons">{% render 'product-variant-options',product: product,option: option,block: block%}</div> |
Now we need to open the file that the snippet is rendering. The product-variant-options.liquid file is located under the snippets folder. We will need to open this file.
EDIT OUR VARIANT OPTIONS
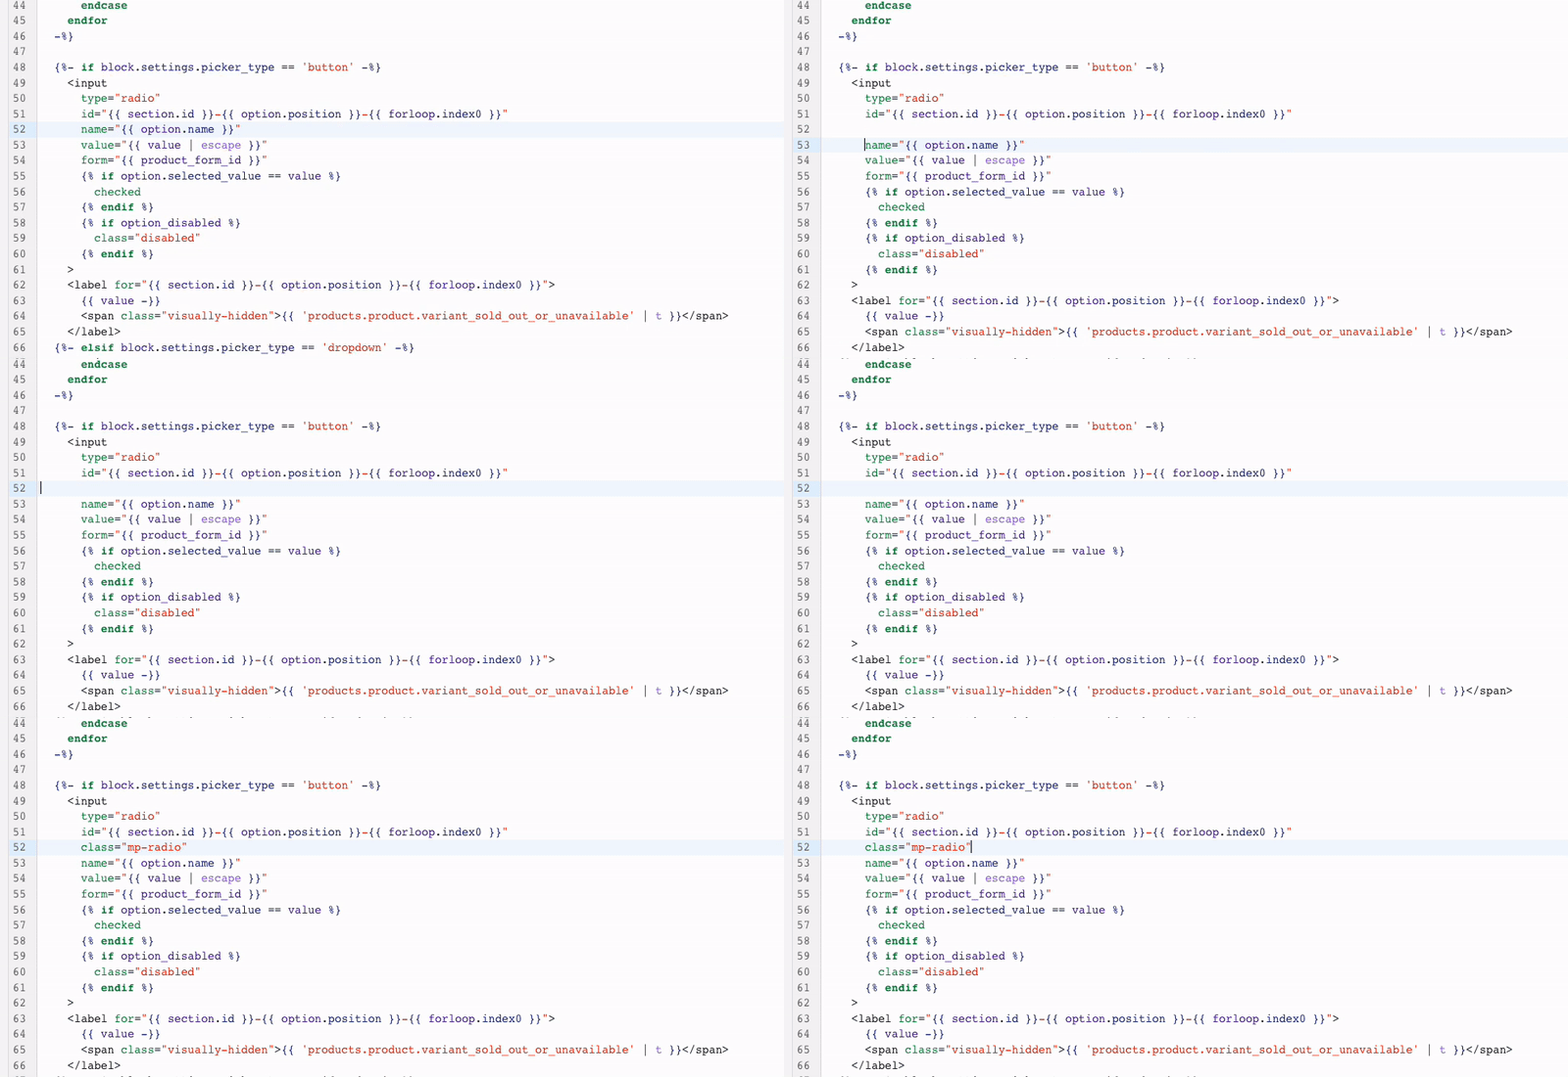
Find the first input tag on line 49. Wrapped in the input tag, find the name attribute.
Just above name="{{ option.name }}", we’re going to squeeze in our class attribute.
Add class="mp-radio" and save.
WEB COMPONENTS
Navigate to assets/global.js and select it to open.
Search for the VariantSelects
[Mac ⌘+ F | PC Ctrl + F (Click inside the code window frame–so you don’t trigger your browser’s search)].
Our goal is to update our main slider and our thumbnail slider so we need to emit a few events.
In the VariantSelects class, we need to add:
onVariantChange() {this.updateOptions();this.updateMasterId();this.toggleAddButton(true, '', false);this.updatePickupAvailability();this.removeErrorMessage();this.updateVariantStatuses();if (!this.currentVariant) {this.toggleAddButton(true, '', true);this.setUnavailable();} else {this.updateMedia();this.updateURL();this.updateVariantInput();this.renderProductInfo();this.updateShareUrl();this.updateVariantThumbnails();}window.postMessage({type: 'variant_option_changed',variant: this.currentVariant}, '*')}updateVariantThumbnails() {if(this.currentVariant.featured_media != null && this.currentVariant.featured_media.alt != null) {$('[data-thumbnail-option]').hide();var selected_color = this.currentVariant.featured_media.alt.toLowerCase().trim().replaceAll(" ", "").replaceAll("&", "").replaceAll("amp", "").replaceAll("-", "").replaceAll("/", "").replaceAll("and", "").replaceAll(",", "");var thumbnail_selector = '[data-thumbnail-option="' + selected_color + '"]';$(thumbnail_selector).show();} else {$('[data-thumbnail-option]').show();}} |
There are two styles to the sliders. If you want the products to have a hard stop and not show the other variant image galleries when you slide, keep updateVariantThumbnails enabled.
If you wish to have sliders that keep scrolling, disable this script by commenting it out:
updateVariantThumbnails() {if(this.currentVariant.featured_media != null && this.currentVariant.featured_media.alt != null) {$('[data-thumbnail-option]').hide();var selected_color = this.currentVariant.featured_media.alt.toLowerCase().trim().replaceAll(" ", "").replaceAll("&", "").replaceAll("amp", "").replaceAll("-", "").replaceAll("/", "").replaceAll("and", "").replaceAll(",", "");var thumbnail_selector = '[data-thumbnail-option="' + selected_color + '"]';$(thumbnail_selector).show();} else {$('[data-thumbnail-option]').show();}} |
Scroll to the bottom of global.js. We’re going to declare our Web Components. Save.
class MainProductGallery extends HTMLElement {constructor() {super();this.init()const resizeObserver = new ResizeObserver(entries => this.update());resizeObserver.observe(this);window.addEventListener('message', this.onVariantChange.bind(this))}init() {this.imagesContainer = this.querySelectorAll('.main-product-gallery__images');this.thumbnailsContainer = this.querySelectorAll('.main-product-gallery__thumbnails');this.thumbnail = this.querySelectorAll('.main-product-gallery__thumbnail');this.image = this.querySelectorAll('.main-product-gallery__image');if (this.findCurrentIndex() === -1) {this.setCurrentImage(this.image[0])this.setCurrentThumbnail(this.thumbnail[0])}}onVariantChange(event) {if (!event.data || event.data.type !== 'variant_option_changed') returnif (!event.data.variant.featured_media) returnconst currentImage = Array.from(this.image).find(item => item.dataset.mediaId == event.data.variant.featured_media.id)const currentThumbnail = Array.from(this.thumbnail).find(item => item.dataset.mediaId == event.data.variant.featured_media.id)if (currentImage) {this.setCurrentImage(currentImage)this.setCurrentThumbnail(currentThumbnail)}}update() {this.style.height = `${this.imagesContainer.offsetHeight}px`}setCurrentImage(elem) {this.image.forEach(item => {item.classList.remove('main-product-gallery__image--active')})elem.classList.add('main-product-gallery__image--active')this.update()}setCurrentThumbnail(elem) {this.thumbnail.forEach(item => item.classList.remove('main-product-gallery__image--active'))elem.classList.add('main-product-gallery__image--active')this.update()}findCurrentIndex() {return Array.from(this.image).findIndex(item => item.classList.contains('main-product-gallery__image--active'))}}customElements.define('main-product-gallery', MainProductGallery); |
ATTACH WEB COMPONENT EVENT TO IMAGES
Let’s set up snippets/product-thumbnail.liquid with the data attribute, data-thumbnail-option, which we defined in the VariantSelects element in the assets/global.js file.
Search for “product__media media”. Three div tag results should appear (on lines 60, 72, and 96), and the class selectors should be highlighted.
Paste the code below inside these opening div tags after the class attributes:
data-thumbnail-option="{{ media.preview_image.alt | escape | downcase | remove: ' ' | remove: '&' | remove: 'amp;' | remove: '-' | remove: '/' | remove: 'and' }}" |
Modify this string to suit your website’s needs.
CONNECTING SLICK, WEB COMPONENTS, AND DAWN TOGETHER
The backbone for the sliders on the backend is established. Now we must implement it for the frontend.
LAST STEPS:
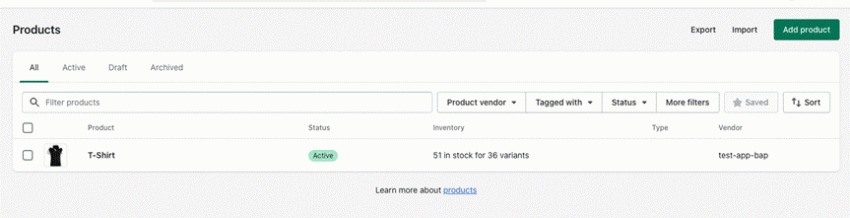
Go back to Shopify’s admin page. On the left menu, select ‘Products’. Select an ‘Active’ product or ‘Add product’. If you need help or a refresher on how to create a product with options please visit here.
OPEN YOUR PRODUCT
In the ‘Media’ area there are a few required steps you must follow for the sliders to work:
- Drag the images that you want to be displayed together next to each other.
- Choose an option to have main order dominance. (The one with the most variable options in a group, ie. Color).
- Main variant images must come first followed by the images you want to be displayed in the thumbnail gallery.
- All images, including variant main images, need an alt tag.
- For every variant group (main image and corresponding thumbnails) the alt tags must be the same.
For example, for all the ‘Small’, ‘Medium’, and ‘Large’, ‘No Collar’ ‘Blue Shirt’ images to display together, image alt tags have been set to say ‘Blue No Collar’. It doesn’t matter what you write in the alt tag as long as it’s the same.
SETTING ALT TAGS
Click on one of the images. A new window should have popped up.
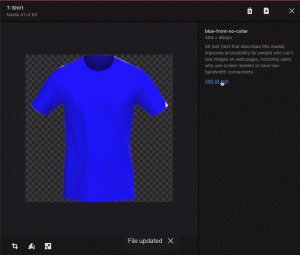
On the right side, click ‘Add alt text’. Set alt text. Save. Repeat. ‘Add alt text’. Set alt text. Save. Repeat.
If you enjoyed this post, I’d be very grateful if you’d help it spread by emailing it to a friend or sharing it on Twitter or Facebook. Thank you! you might also enjoy these posts