Node.js has emerged as the preferred technology stack for Shopify app development. It pairs perfectly with React and Shopify’s Polaris UI library, making it ideal for apps that embed directly into the online stores of Shopify merchants.
This tutorial shows how Node.js Shopify apps can be deployed to a Digital Ocean production server. The server will have the following features:
- NGINX Reverse Proxy
- Node.js App launched as a PM2 process for production-grade stability
- Valid SSL certificate included for HTTPS
- Ability to easily add additional server blocks so that multiple Node.js apps can be served in parallel. You can use a single $5/month droplet to host multiple Node.js Shopify apps at once.
Contents
- Why Digital Ocean
- Prerequisites
- Creating a Digital Ocean Droplet
- Configuring DNS
- Configuring the Shopify Partner Dashboard App Setup
- Setting up a non-root user and firewall
- Configuring NGINX
- Installing Node.js
Why Digital Ocean
Digital Ocean is ideal for hosting Shopify Node.js apps for the following reasons:
- Digital Ocean gives you complete control of your server. You can install whatever you want on it and use it however you like.
- Digital Ocean gives you a relatively powerful server for an affordable price.
- Digital Ocean servers can leverage NGINX server blocks so that multiple Shopify apps can run on a single Digital Ocean droplet at the same time.
Prerequisites
A few things need to be in place before getting started. You will need:
- A Digital Ocean account. If you don’t have one already, you can Sign Up Here and get $100 in free credit over 60 days.
- A Shopify Partners account with your app setup.
- A working Node.js Shopify app (You may have developed it locally and used a service like NGROK to test it).
- The code for your project should be managed with Git and pushed to a remote repository on GitHub or similar.
- A domain name that you can use for your app. Using a subdomain (eg myapp.mydomainname.com) works well.
In addition to the hard prerequisites listed above, some familiarity with the command line, SSH, Git, and web servers would be helpful.
Creating a Digital Ocean Droplet
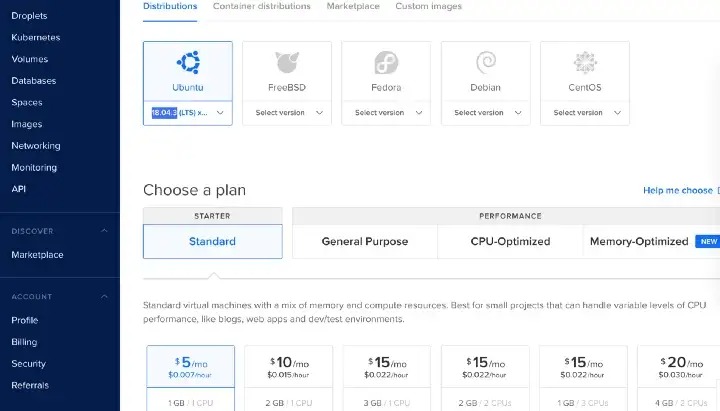
Once you have a Digital Ocean account in place you can create a new Droplet from your dashboard.
Select Ubuntu (18.04 is used in this tutorial). The $5/month 1GB/1CPU (least expensive option) is fine for now. You can always resize it later if you have to.
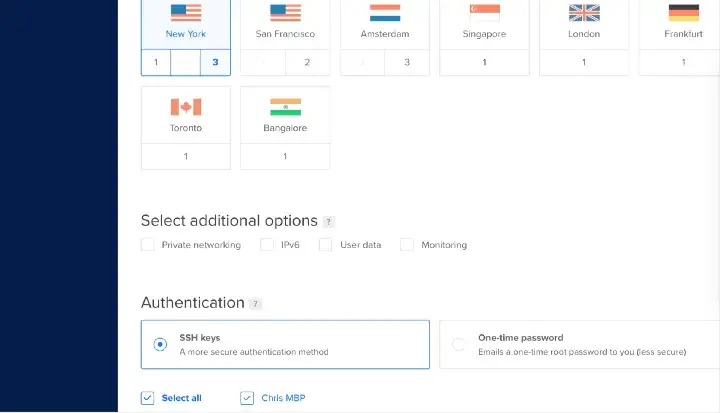
Select the region that is closest to your users. New York isn’t a bad location to pick if you aren’t sure. If you are familiar with using SSH keys you can add your public key to your Digital Ocean account. If not, accessing the server with a password is fine.
The other droplet settings can remain as is. From here you can go ahead and create the droplet. It should only take a couple of minutes to spin up.
Configuring DNS
DNS can take some time to propagate, so we may as well do that first.
The IP Address of your droplet should now be visible in your Digital Ocean dashboard. Using your DNS registrar of choice, create an A record pointing to your droplet.
For example, I created an A record for test.northern-apps.com and set that to my droplet’s IP address, 165.227.64.224.
Configuring the Shopify Partner Dashboard App Setup
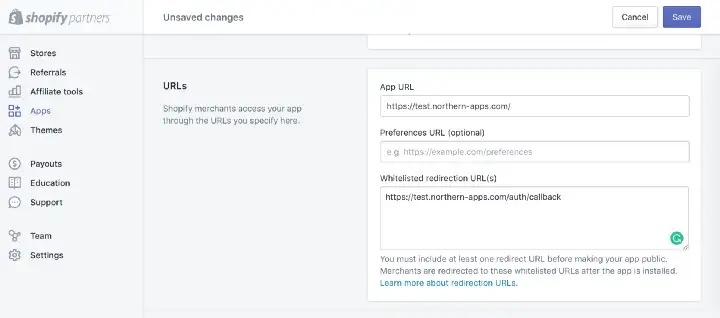
From your Shopify Partner dashboard, update the App URL and Whitelisted redirection URL(s) to match your production domain name. My settings looked like this:
Setting up a non-root user and firewall
Before thinking about NGINX or Node.js you will need to do a little preliminary work to prepare your server. Follow this Digital Ocean tutorial to create a non-root user and a basic firewall:
Installing NGINX
SSH into the server using your non-root user and execute the following commands:
sudo apt update

sudo apt install nginx
Next, use this command to open your firewall to NGINX HTTP/HTTPS traffic (ports 80 and 443):
sudo ufw allow 'Nginx Full'
NGINX should now be running. You can check this by entering your droplet’s IP address into your browser. You should get a “Welcome to Nginx!” message.
If you enjoyed this, you might also enjoy these post
