Contents
1 Shopify: Best E-Commerce Platform
2 What exactly are CSS and JavaScript?
2.1 Step 1: Sign in to your Shopify dashboard
2.2 Step 2: Access the theme folder
2.3 Step 3: Edit the code
2.4 Step 4: Adding a new asset
3 ADDING CSS FILE
3.1 Step 5: Adding CSS
3.2 Step 6: Adding customized CSS to the file
3.3 Step 7: Adding CSS Asset to Liquid File
4 ADDING JS FILE
4.1 Step 8: Creating Customized JS File
4.2 Step 9: Adding custom JS
4.3 Step 10: Adding JS Asset to Liquid File
5 UPLOADING A NEW ASSET
5.1 Step 1: Adding a new asset
5.2 Step 2: Uploading CSS or JS File
5.2.1 For adding CSS, you will need to use this tag:
5.2.2 For adding JS, you will need to use this tag:
CSS and JavaScript are both front-end web development languages. The websites are always supported by these languages in some way or the other. Other than that, HTML is one important markup language that is used for designing the structure of web pages. So, basically, a website revolves around these three languages, that is, HTML, CSS, and JavaScript.
Shopify: Best E-Commerce Platform
Shopify is an e-commerce platform that allows anyone to set up an online store and sell their products. For instance, if you own a business that sells attires online, choosing Shopify would greatly help maximize sales and ROI. With this platform, one can easily create an online store, add product images, prices, and offers, and start selling.
What exactly are CSS and JavaScript?
CSS or Cascading Stylesheets is a web development language that makes web pages quite attractive and appealing to the human eye. While JavaScript is one high-level programming language that creates a simple web page into a dynamic and interactive version.
In this article, we’ll discuss how one can customize their Shopify store and the steps required to add CSS and JavaScript to the Shopify store. So, without further delay, let’s get started!
Step 1: Sign in to your Shopify dashboard
Firstly, you need to log in to your Shopify dashboard by entering the required credentials. After that, you’ll be able to access the back end of your admin panel as shown below.
Step 2: Access the theme folder
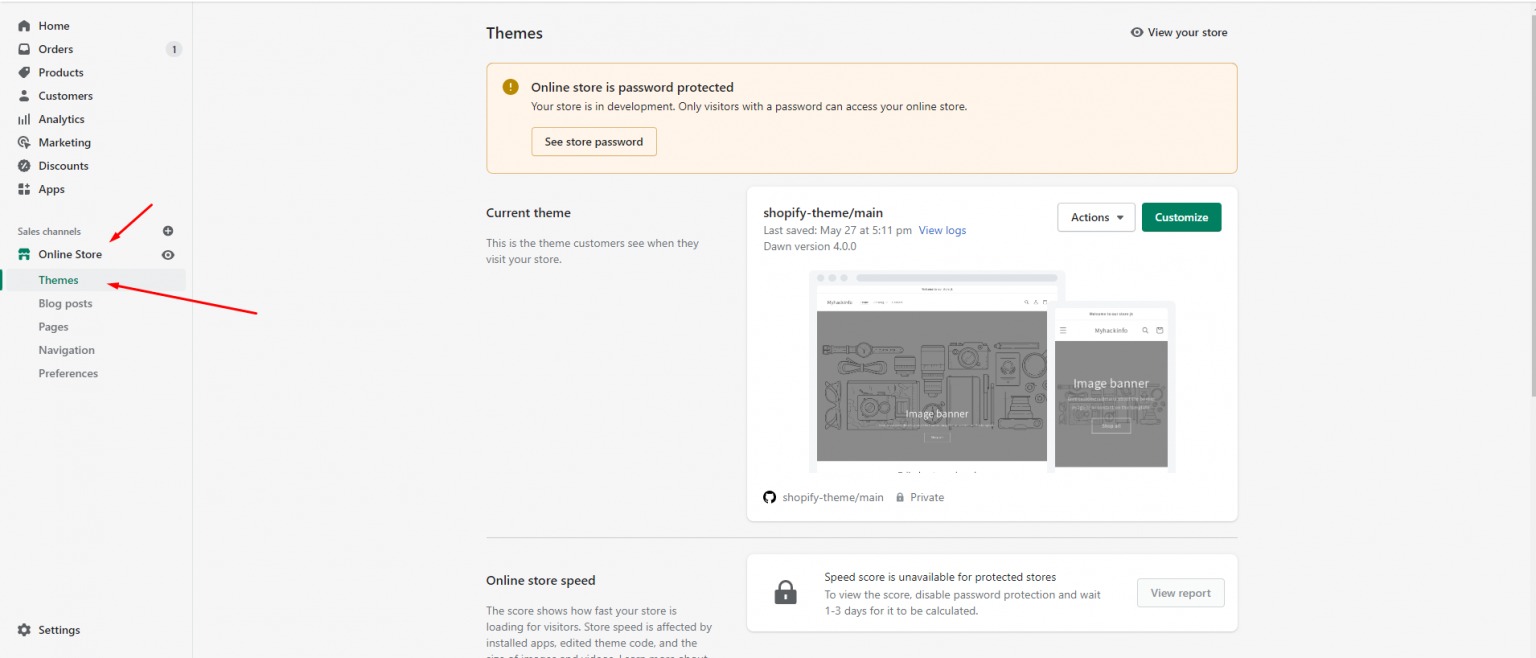
The next step is to click on the ‘Online Store’ which will open up a list of sub-menus. Check out for the ‘Themes’ and click on it.
Step 3: Edit the code
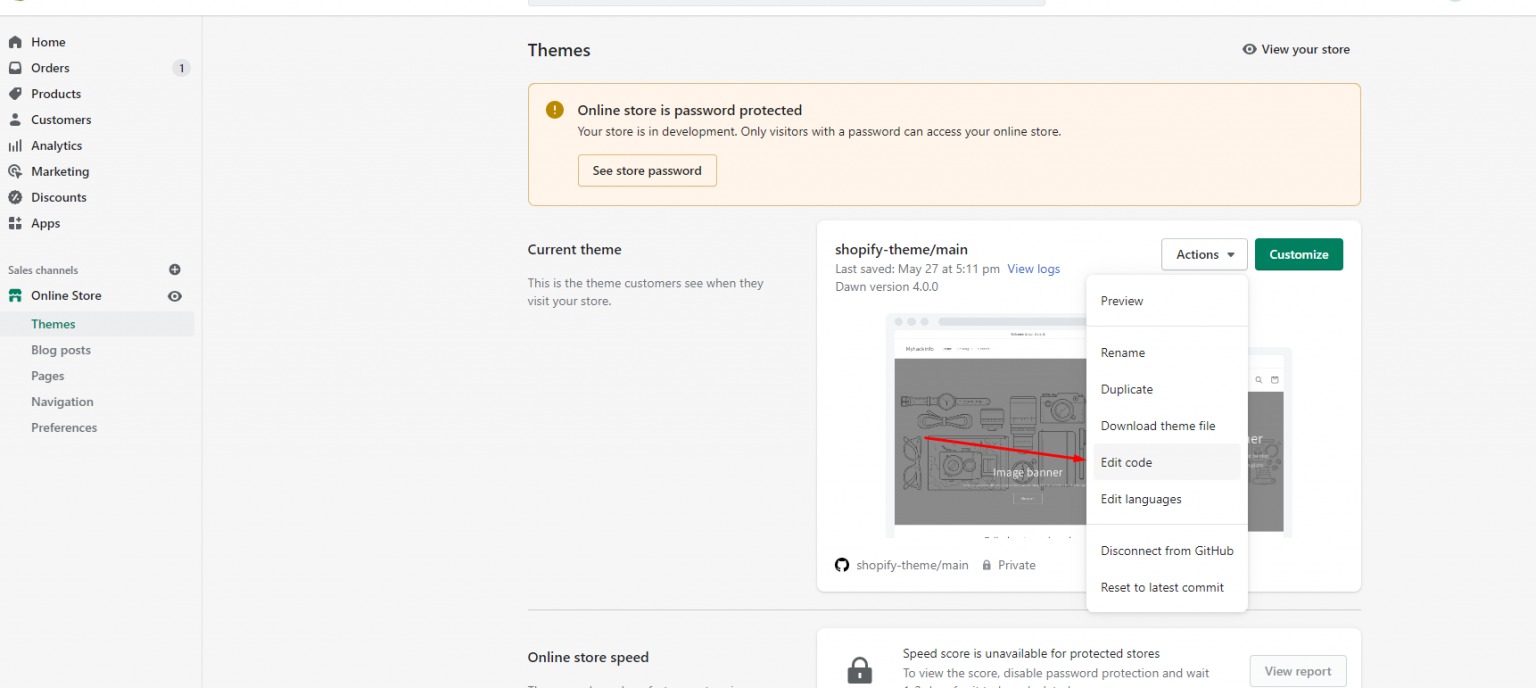
Look through the right side of the window and click on ‘Actions. Clicking on actions will open up a pop-up menu and in that click on ‘Edit code
Step 4: Adding a new asset
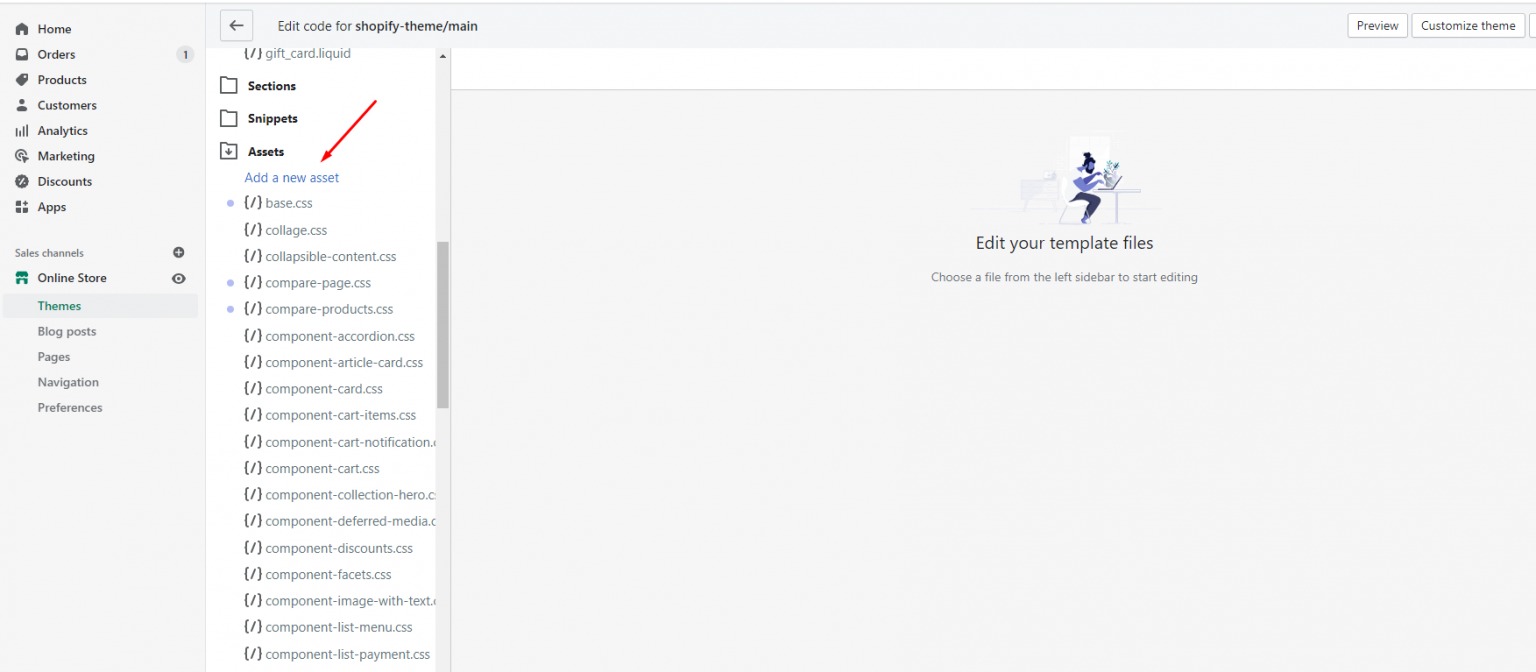
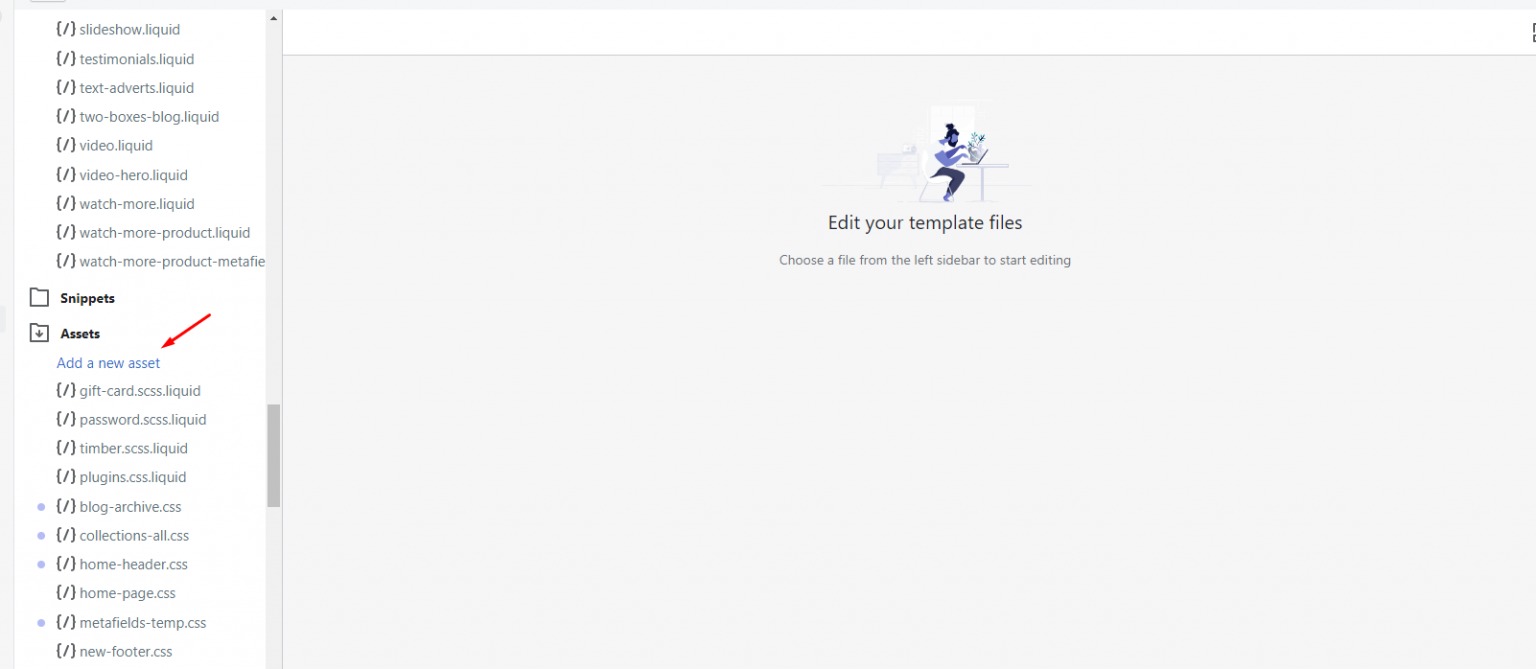
After clicking on ‘Edit Code’, a new window will open with various options on the left-side. Search for ‘Assets’ and then click on ‘Add a new asset’.
ADDING CSS FILE
Step 5: Adding CSS
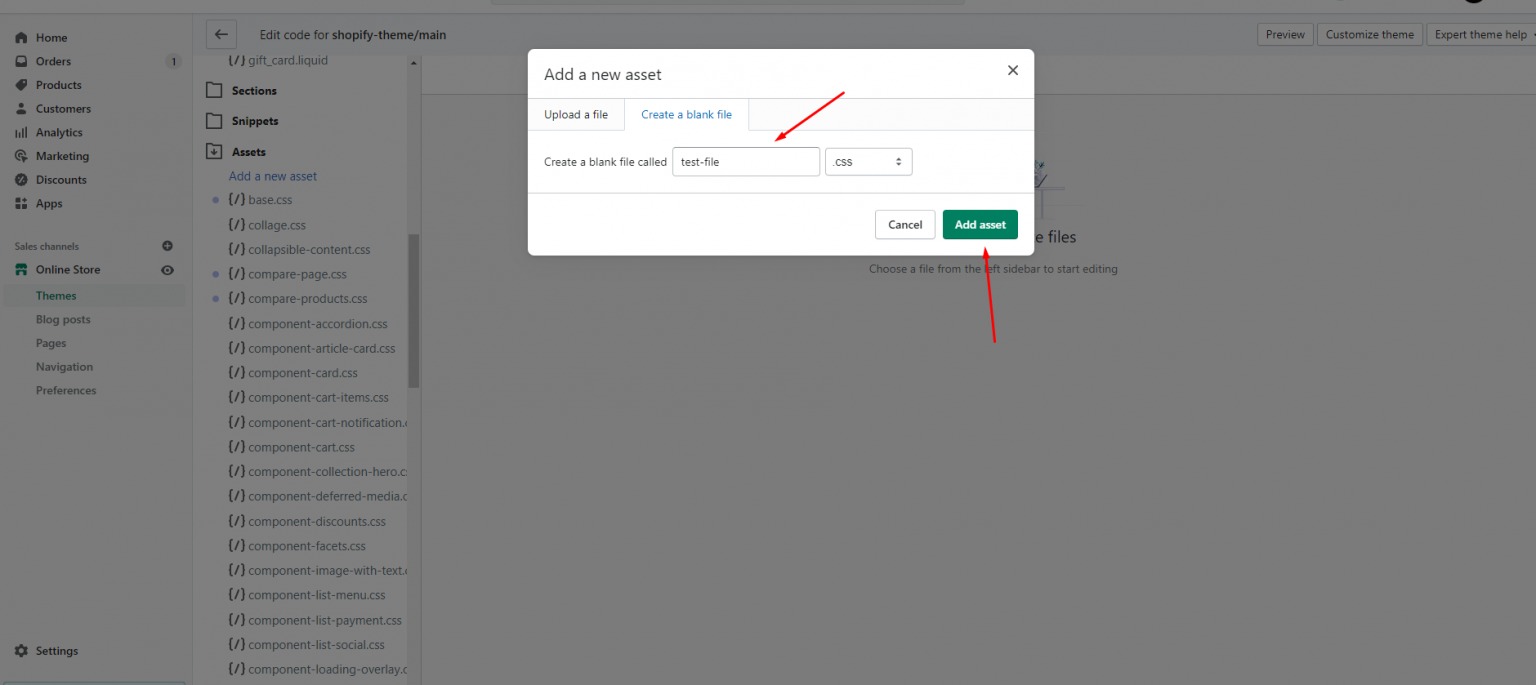
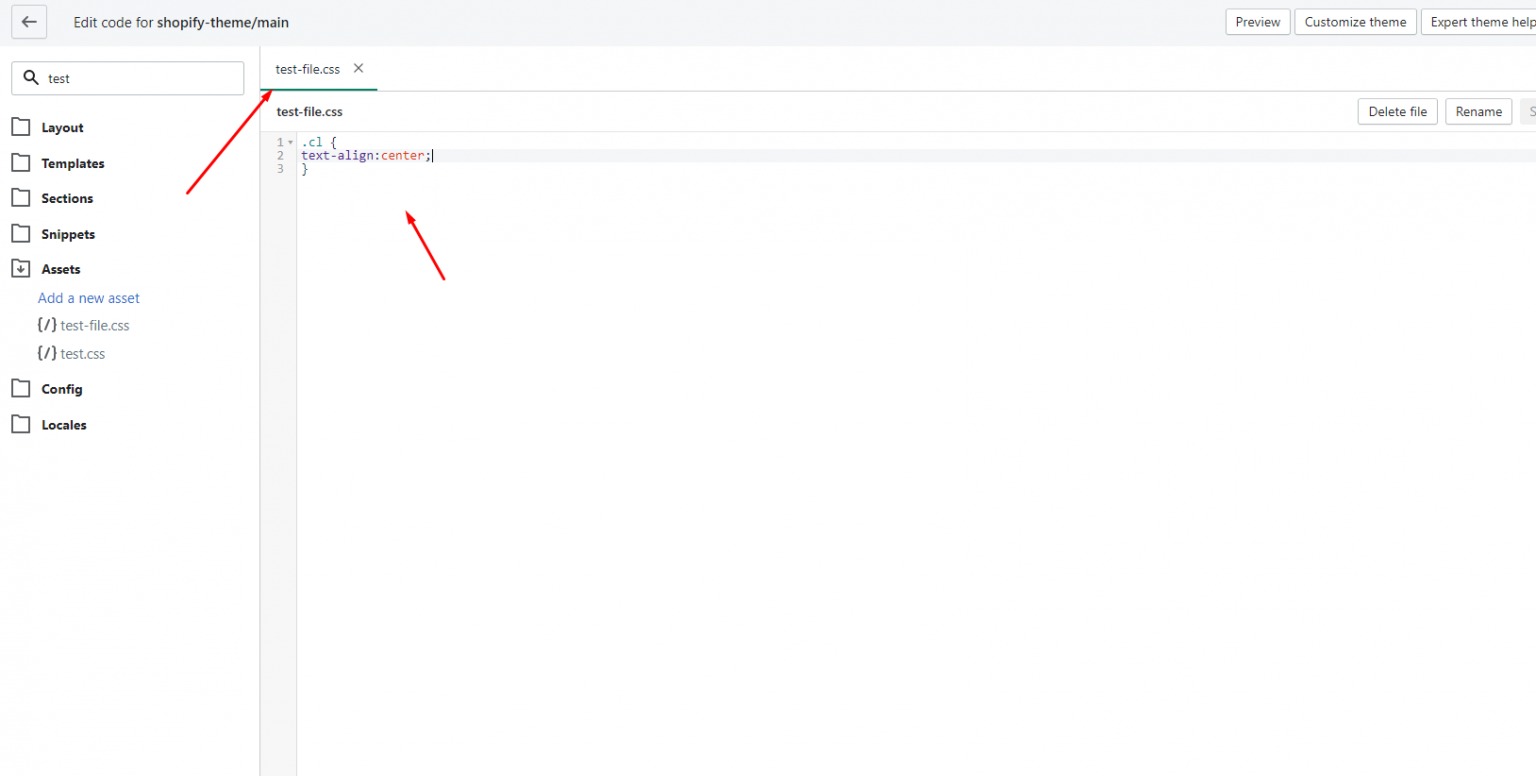
Adding your own customized file of CSS is way simpler than you ever thought it to be. In this pop-up window, create a file in the admin panel directly. Here, we have named it as ‘test-file’. Don’t forget to choose its extension as .css
Then, click on ‘Add Asset’.
Step 6: Adding customized CSS to the file
Here, you can add customized CSS by clicking on the file.
Step 7: Adding CSS Asset to Liquid File
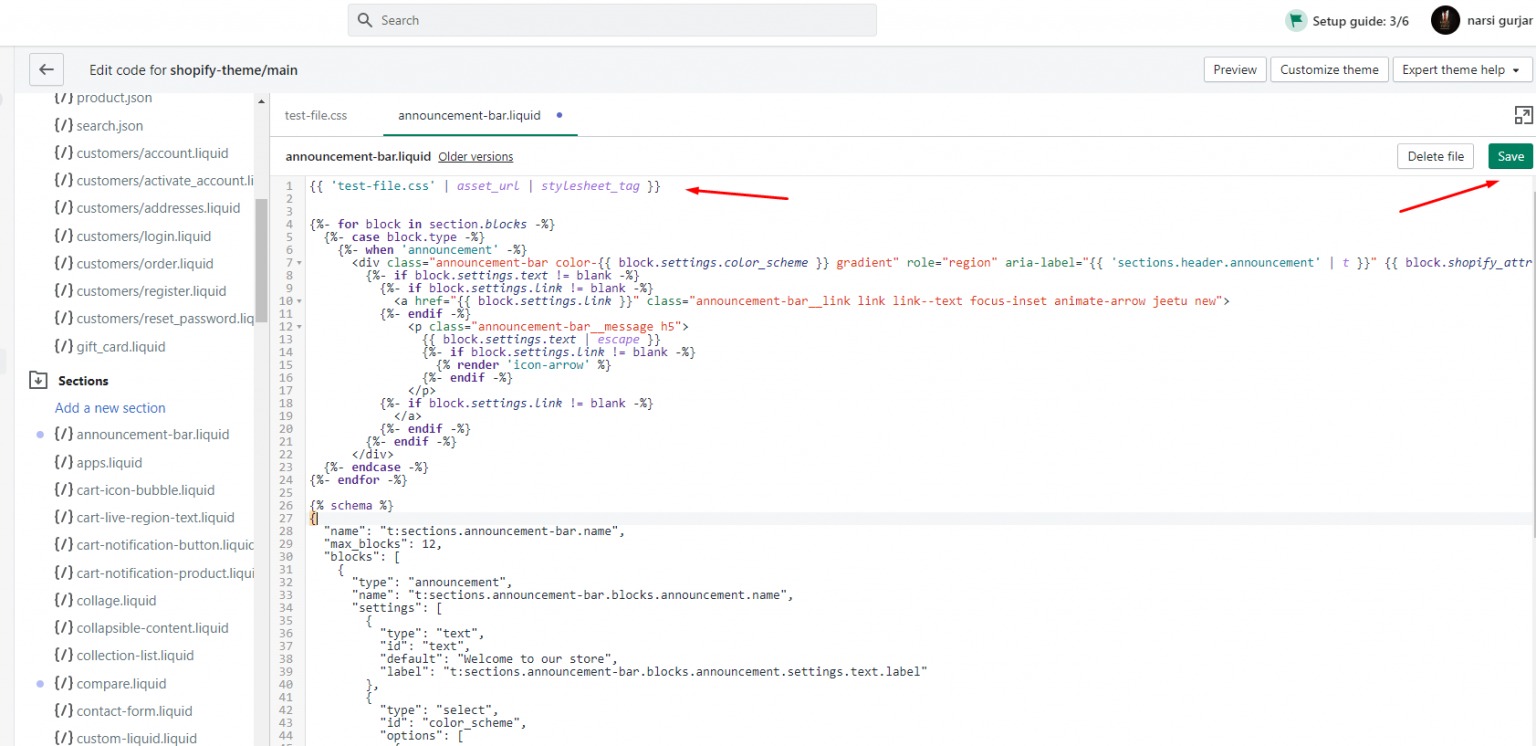
After creating a CSS file, you can now add it to your liquid file to ensure the fact that your customized codes are loaded. Add the liquid code to the <head> section where ‘test-file.css’ is the name of the CSS file that we created.
Use the following code to add a custom CSS file.
{{ test-file.css’ | asset_url | stylesheet_tag }}
Click on Save!
ADDING JS FILE
Step 8: Creating Customized JS File
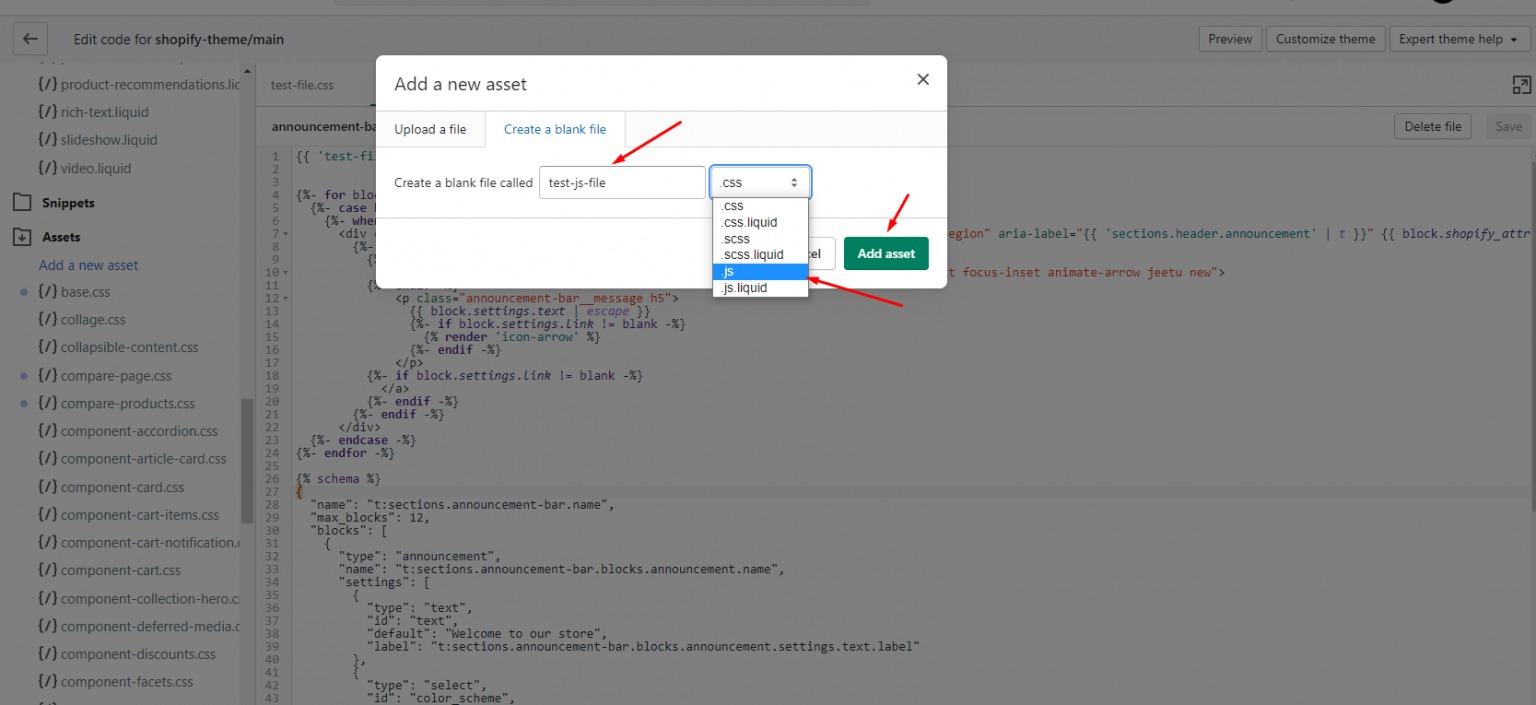
To add a JS file, follow the same steps. The only change this time you have to make is to change the file extension of your file from .css to .js
Here, we’ve named this file as ‘test-js-file’. Choose its extension as .js
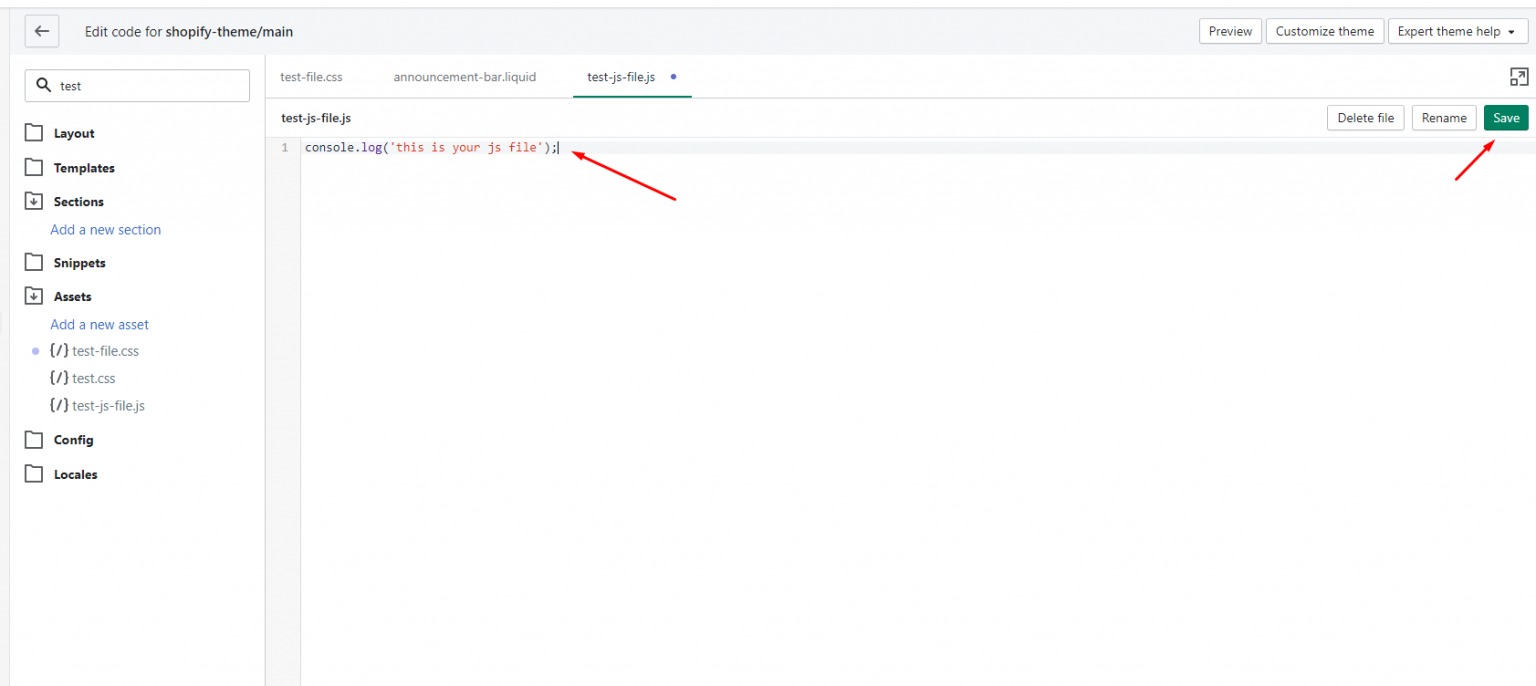
Step 9: Adding custom JS
You can now go ahead to add customized JS to the file. Don’t forget to hit the ‘Save’ button.
Step 10: Adding JS Asset to Liquid File
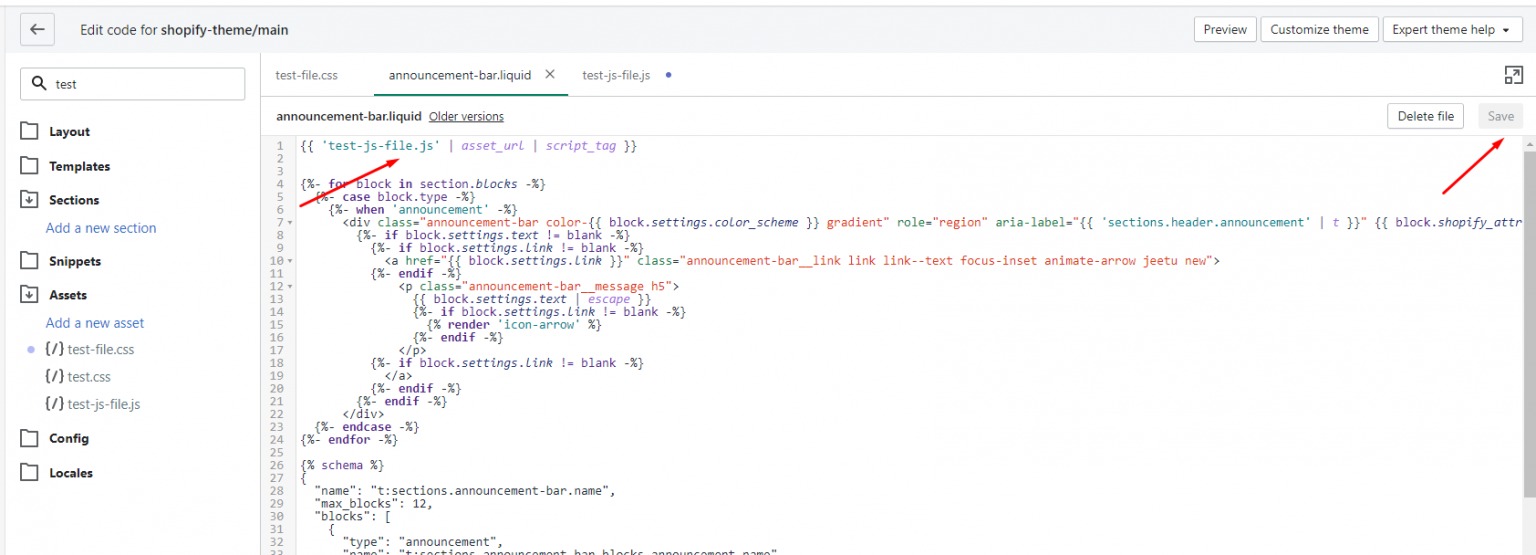
After creating a JS file, the next step is to add it to your liquid file. Add the liquid code to the <head> section where ‘test-js-file.js’ is the name of the JS file that we created.
Use the following code to add a custom JS file.
{{ ‘test-js-file.js’| asset_url | script_tag }}
Click on ‘Save’ button!
UPLOADING A NEW ASSET
Instead of customizing your own CSS or JS file, you can even upload it if you have a ready file. To do so follow the steps:
Step 1: Adding a new asset
Go to ‘Assets’ and then click on ‘Add a new asset’.
Step 2: Uploading CSS or JS File
After clicking on ‘Add a new asset’, go ahead and click on ‘Upload a File’. Next, browse for the file by clicking on ‘Choose File’. Then, click on ‘Upload Asset’.
For adding CSS, you will need to use this tag:
{{ ‘rename_it.scss’ | asset_url | stylesheet_tag }}
For adding JS, you will need to use this tag:
{{ ‘rename_it.js’ | asset_url | script_tag }}
Conclusion
No doubt, HTML is the building block of a website. But adding CSS and JS equally plays an important role. It improves the appearance and activeness of a website.
In this article, we’ve covered all the required steps to add CSS and JS to Shopify. Follow all the steps and if you have any queries, do let us know in the comment section!
If you enjoyed this, you might also enjoy these post


