Shopify Gift cards are an excellent way to give your loyal customers a little something to show appreciation.
They can even be bought as presents, and the person who got the gift card will then use them in your store. This way, you’ll get a sale and two happy customers instead of one, doubling your chances of a review and boosting your store’s reputation simultaneously.
Now that you know why Shopify Gift cards are the next step for your e-commerce business, let’s look at how they work and how you can start creating them.
How does a Shopify gift card work
You can think of these gift cards as you would for other products. Your customers can purchase them and then give them away to their friends.
When someone adds a product to their cart and starts the checkout process, they will be able to use the gift card to pay for that specific product.
How to create a Shopify gift card
There are two ways you can create gift cards: using Shopify’s built-in functionality or an app.
Let’s start with the built-in functionality and then move to some of the best apps.
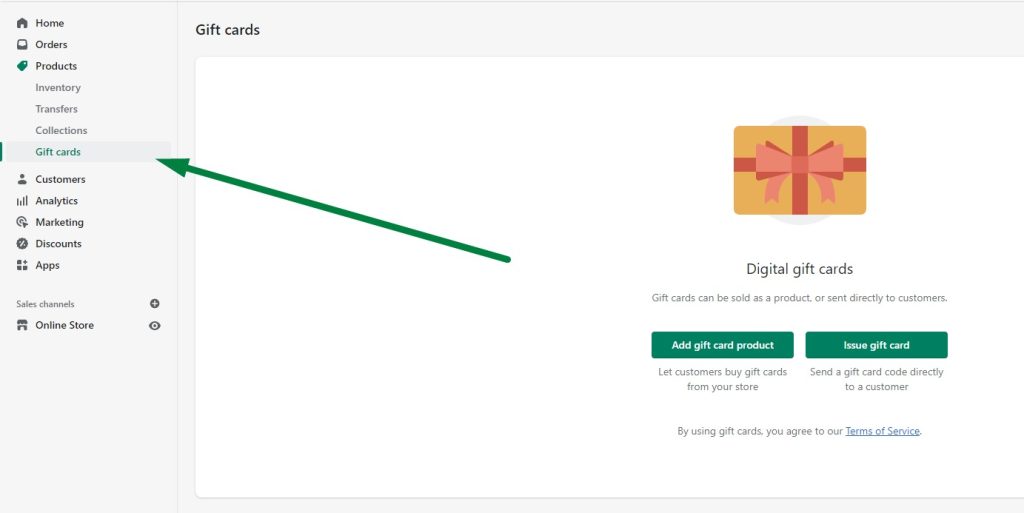
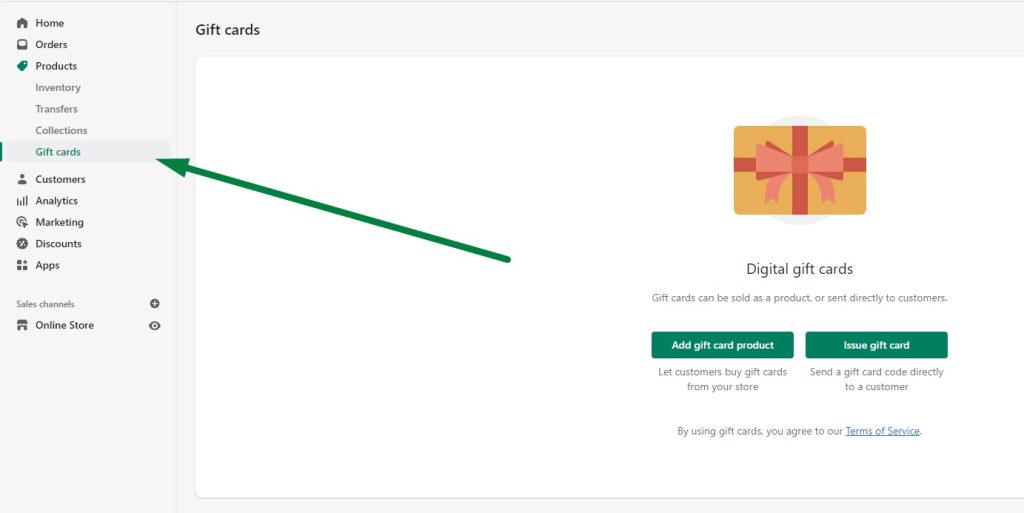
Step 1. Log into your Shopify store and go to Products -> Gift cards. Here you’ll see two options; for now, simply click on the “Add gift card product.”
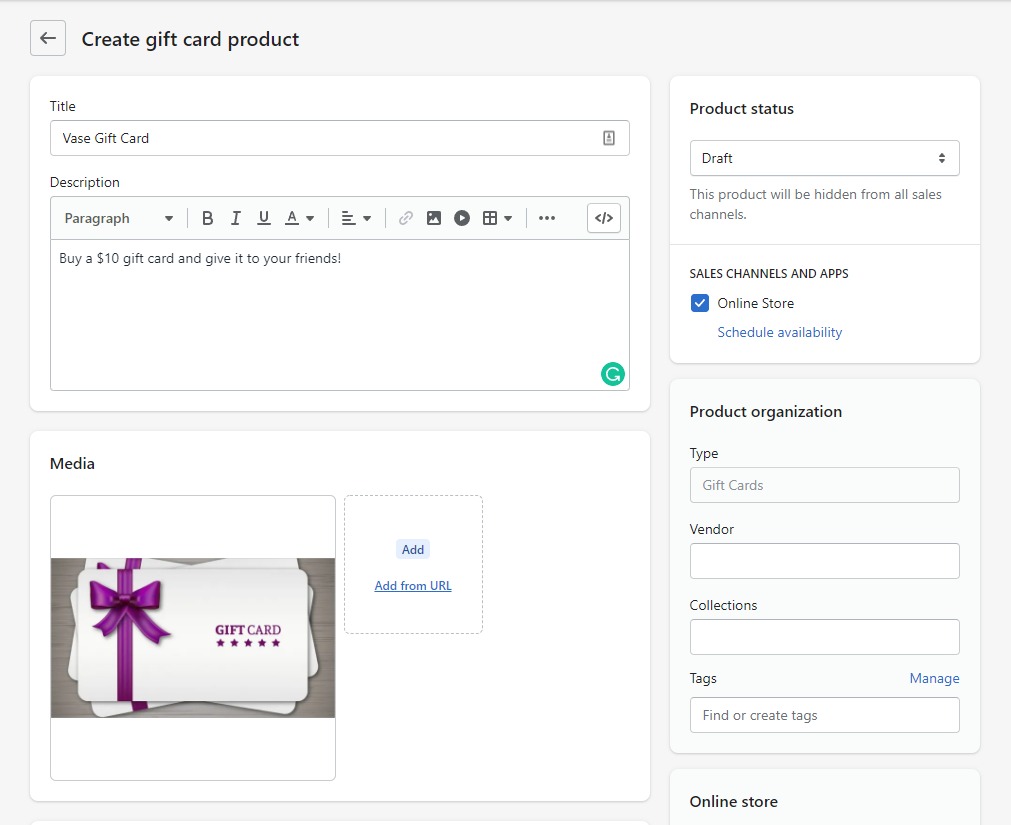
Step 2. Complete the necessary product information. Chances are you have already added some products to your store, so this process should be pretty straightforward.
Make sure to give your product a descriptive name and description. An image would also work wonders.
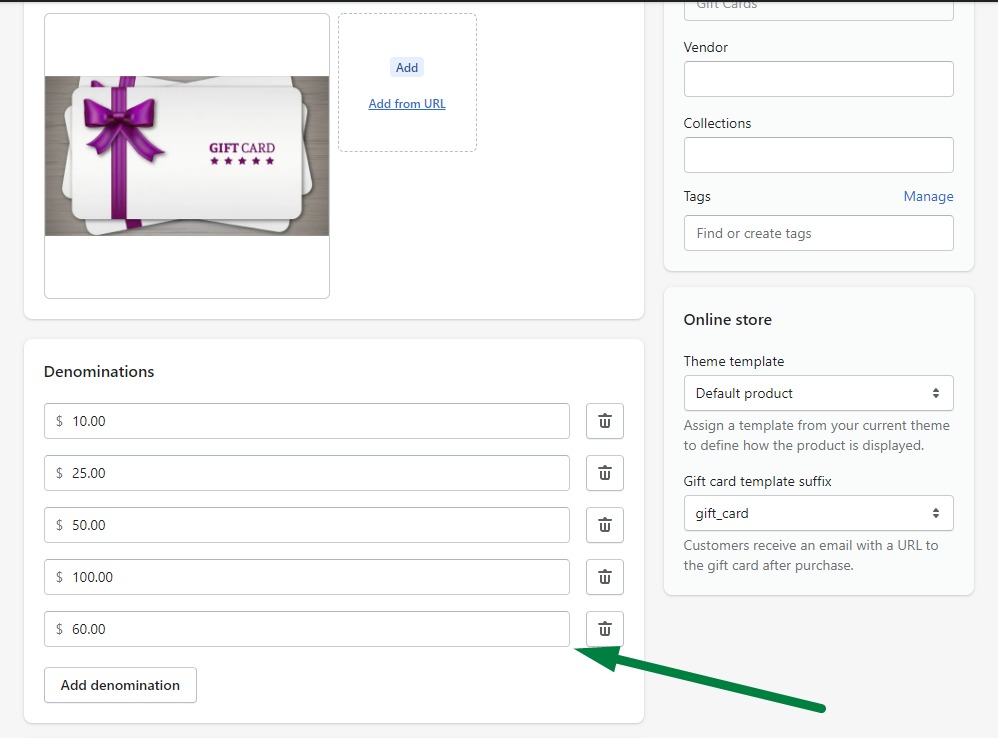
Step 3. Choose your denominations. Shopify creates four denominations by default ($10, $25, $50, and $100), but you can always add extra or remove some of them if you feel like it.
As a best practice, you should match your gift card denominations with the average price of your products. For example, say your products cost around $30 each. In that case, you might want to add a $60 denomination so people can gift two products simultaneously.
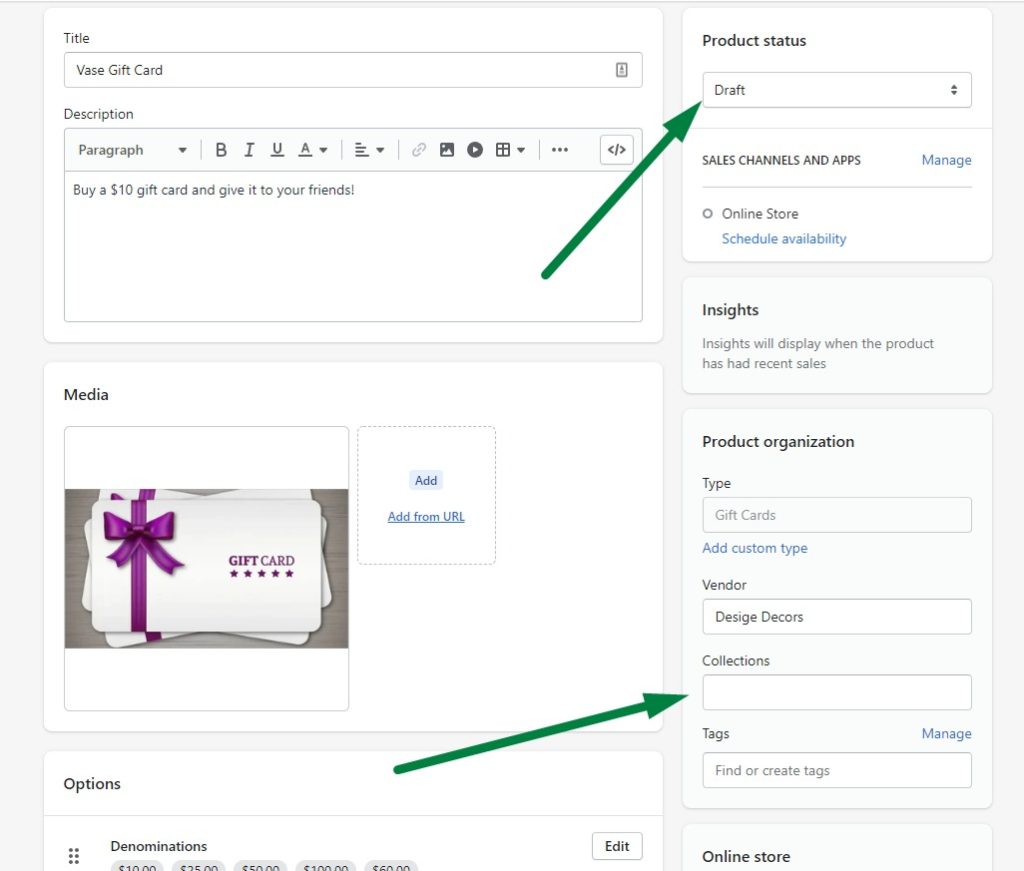
Step 4. Change the product status to “Active” and choose a collection. Once satisfied with the product details, it’s time to push it live.
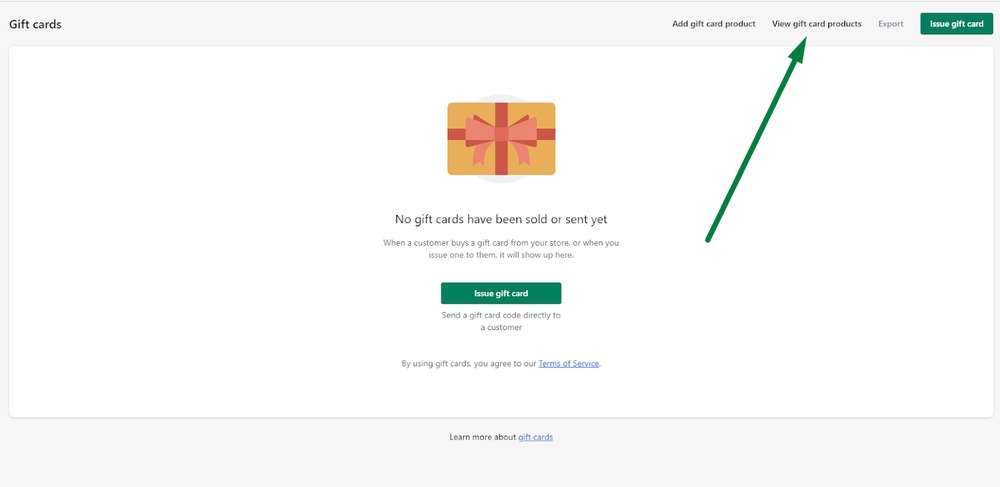
Step 5. Save your changes. Once you save your changes, you will be taken to your products page. If you want to create a new gift card or edit the one you just created, simply click on Gift cards (as you did in Step 1) and select “View gift card products.”
This will automatically filter your products, so you will only be able to see your Gift cards.
You can open the gift card editor by clicking on the corresponding gift card.
That’s it. Now customers can purchase gift cards from your store.
How to issue single-use Shopify gift cards
This type of gift card is great if you want to thank loyal customers for purchasing from you multiple times. Your customers will appreciate a gift card more than a discount code.
Step 1. Navigate to the gift cards page.
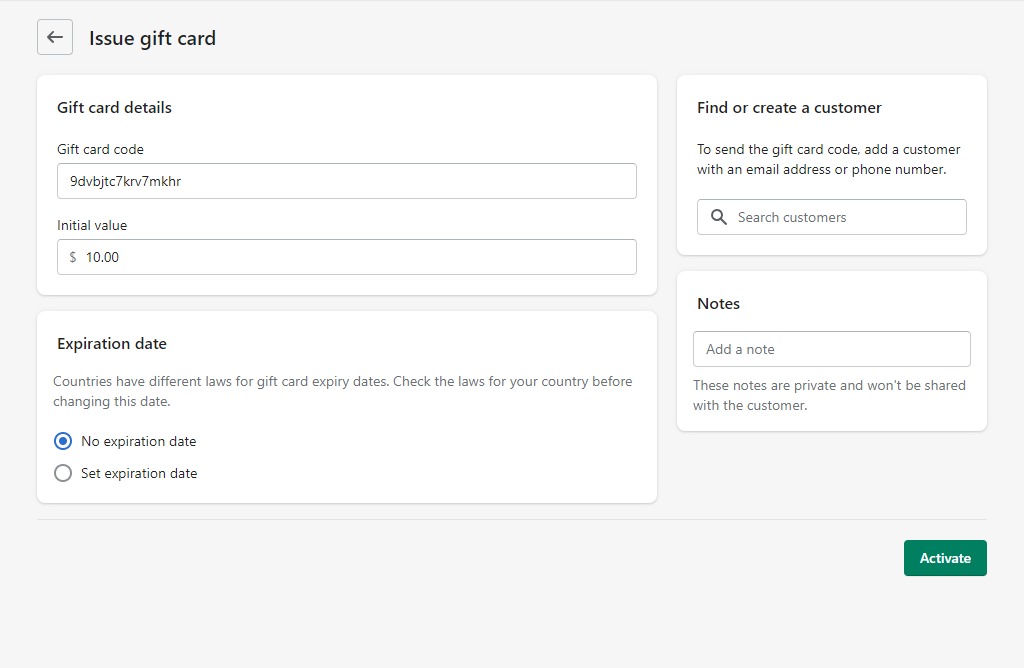
Step 2. Click on the “Issue gift card” button. This will open up a page that will allow you to configure the gift card.
Step 3. Configure the gift card. Now you can edit the Initial amount of the gift card, select which customer it applies to, set an expiration date, and even add a note so you remember why you created it.
Important note: Make sure you copy this code right now, as you will not be able to see it again after you create the gift card.
Step 4. Select or create a customer and click “Activate.” Once satisfied with your gift card options, you just need to select the customer you want to send it to and click on the “Activate” button.
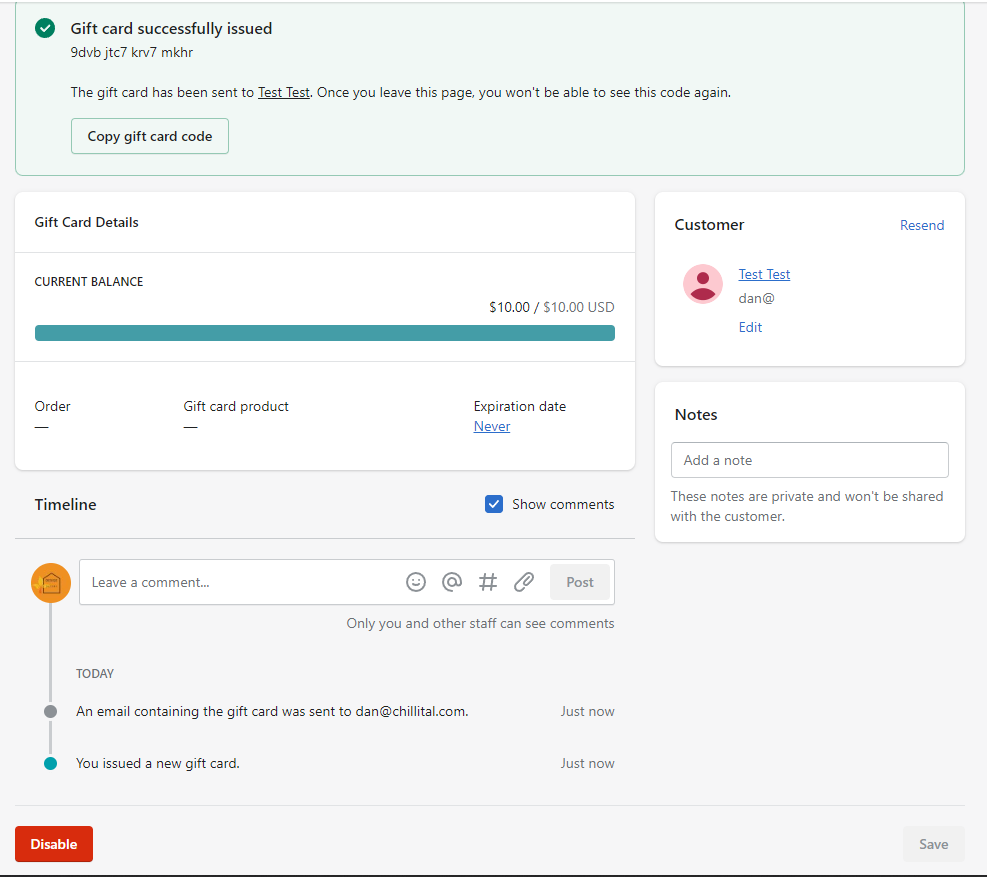
Right after that, you will see this page featuring all relevant information regarding your newly issued gift card.
This is the last time you can copy that code, so make sure you do so in case you skipped it earlier.
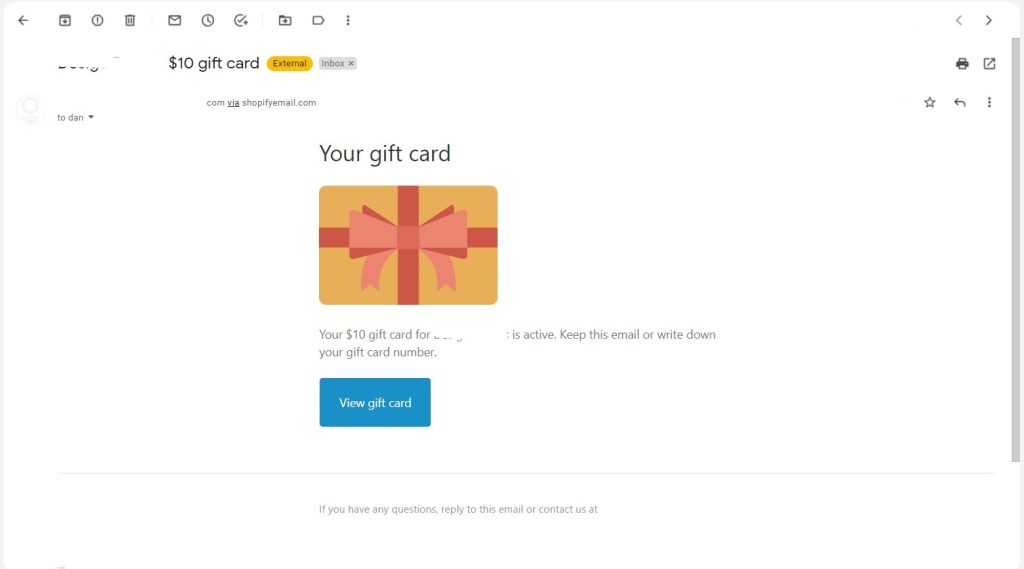
That’s it. Your customer will instantly get an email letting them know they have a gift card they can use in your store.
Depending on your store’s theme, your customer will see something like this when they click on the “View gift card” button inside the email.
if you enjoyed this, you might also enjoy these post

