Metafield is one of the most used features in Shopify but it is quite complicated for regular users to implement. Its application in Shopify is varying from adding custom fields to a product page to customizing the Shopify filter. let me show you How to Use Metafields in Shopify Store (Step by Step)
If you look at the documentation on Shopify Help Center, it suggests hiring a professional web developer to successfully add or display meta fields.
It is inconvenient, isn’t it?
If you, a small business owner, are struggling to save every penny for your business, or don’t have time to deal with recruitment, then this article is definitely for you.
Table of Contents
What is a metafield?
Metafields (or custom fields) help you put extra information on your store which isn’t included in Shopify basic configuration.
For example, you want to specify where the product’s origins are, or add a downloadable manual pdf for your product, etc. These things will need you to use metafields.
To create a metafield product, you have to fill out the required information below
Custom Fields of Metafield
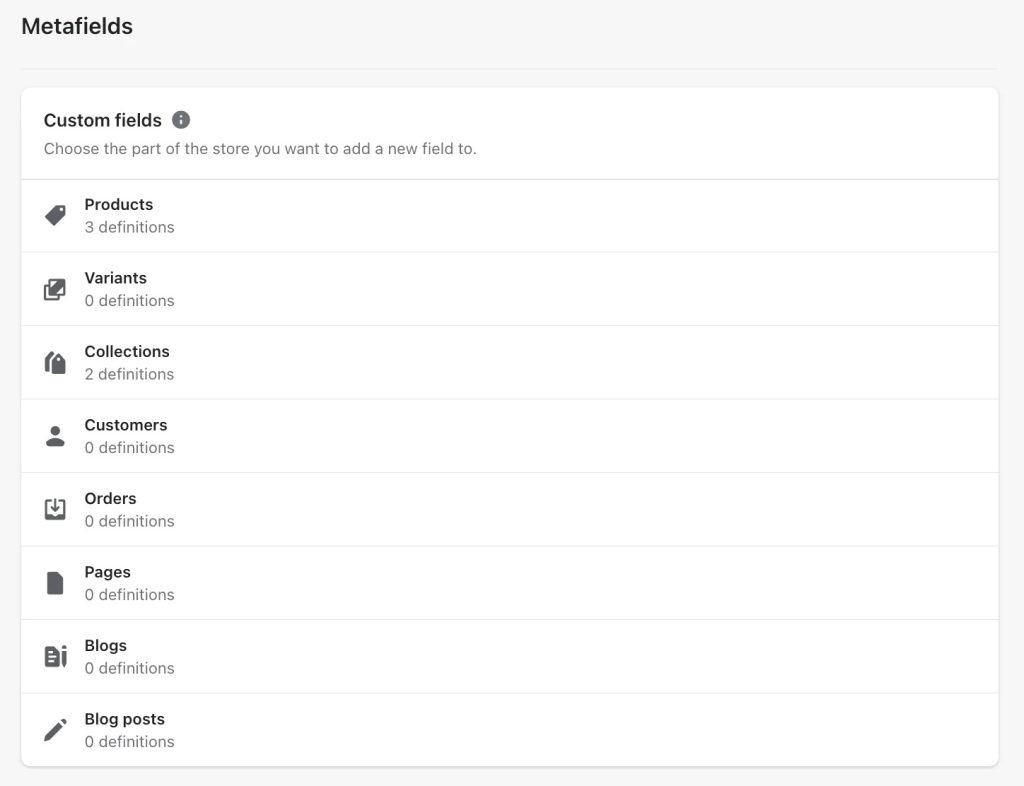
Shopify, there are 8 custom fields of Shopify metafields you can use right now.
1. Shopify Product Metafields
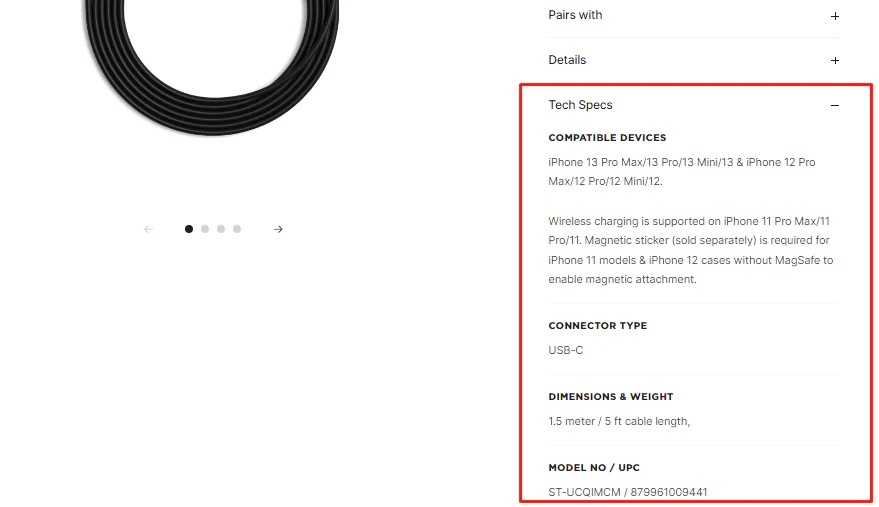
This is the most common one. It helps us show additional information for each product on the product page.
For example, proper use of metafields can help you show tech specs like this electronic store:
2. Shopify Variant Metafields
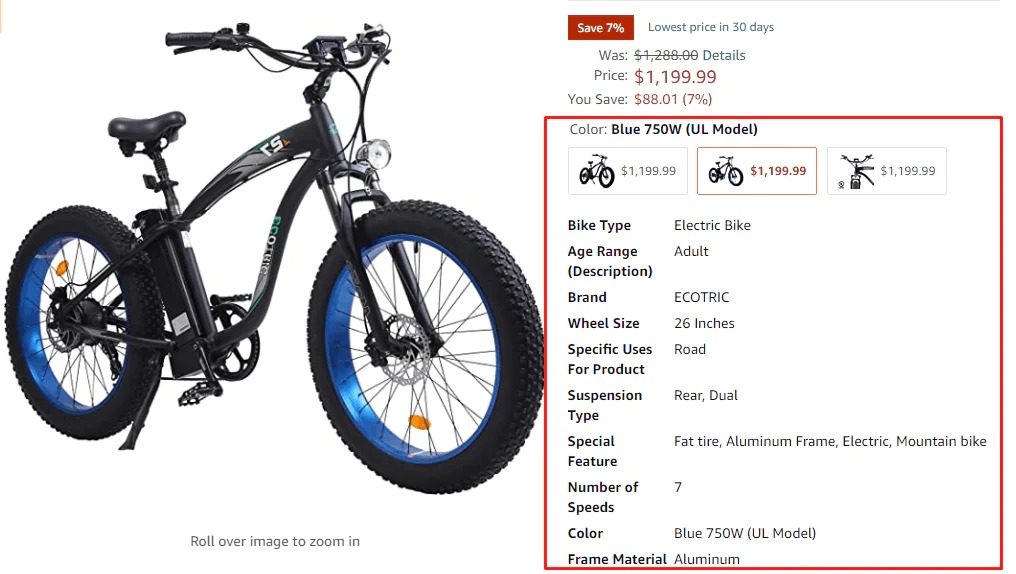
This type of metafields helps Shopify users add extra information for each variant of the products.
The picture below is an example of how you can use variant metafields. With each color variant, there will be different information in the bike’s parameters.
3. Shopify Collection Metafields
This newly released type of metafields allows merchants to be more creative with collection pages.
An excellent example here is the additional information of a discount campaign. You can add a Metafields definition for the sales details, and another one for the countdown timer to create a sense of urgency.
4. Shopify Customer Metafields
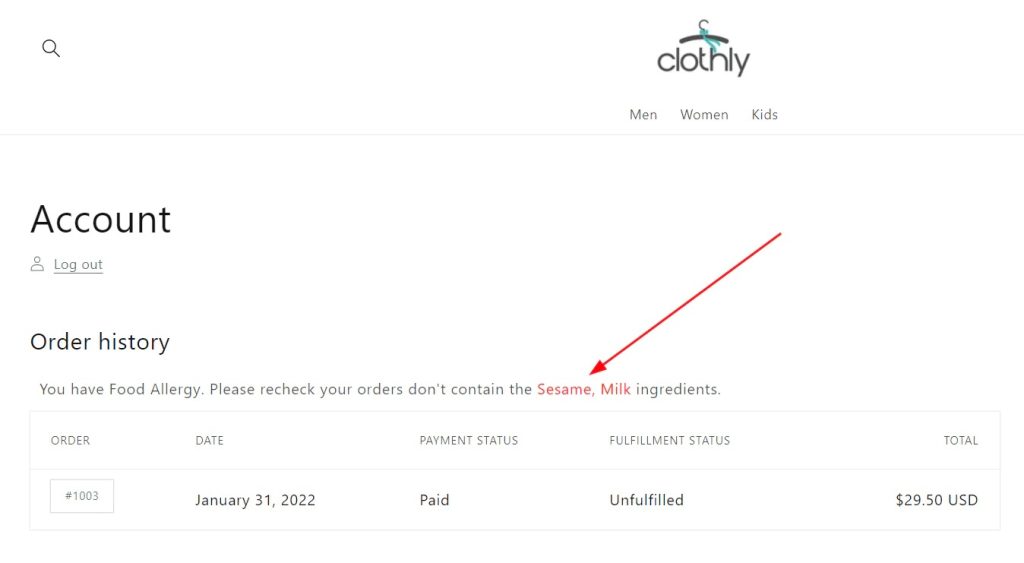
Metafields for customers’ information is a brilliant feature to help you with customer segments based on custom and specific customer details.
Use these meta fields-based customer segments as filters, you can:
- Send targeted emails to specific customer groups, for example : customers that view a particular product in the last 7 days.
- Display reminders on account pages for customers to review their orders.
- Define loyalty tiers to segment discounts.
5. Shopify Order Metafields
There are many ocassions where you need some extra information for your store orders. Identixweb has named a few as follows:
- Add remark to your orders
- Arrange the order as per priority
- Mark the order for normal or express delivery
- Give ratings to the orders
In these cases and more, you can now use Shopify Order Metafields instead of a third-party app.
Similary, you can add metafields for Shopify Pages, Shopify Blogs, Shopify Blog Posts thanks to the latest update of Online Store 2.0.
Metafields List
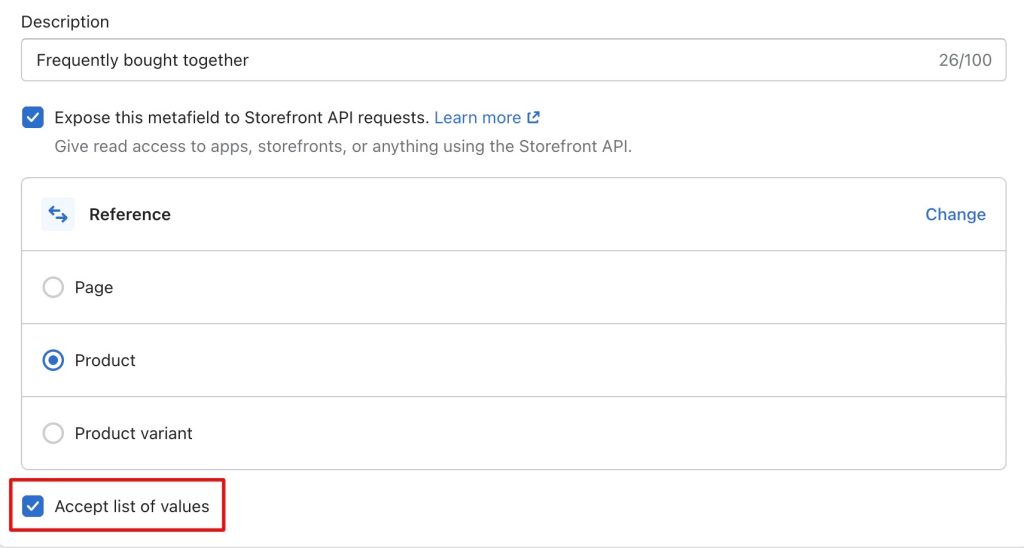
Simply put, this is an improvement in which Shopify allows metafields to store a list of value instead of a single value in the past. However, not all content types support this upgrade.
Content types of Shopify metafields that accept list values are: Color, Date/Date & Time, Dimension, Weight, Volume, Number, Rating, Product reference, File reference, Page reference, URL, Text.
When choosing the supported content types, you’ll see a little checkbox for list of values like below.
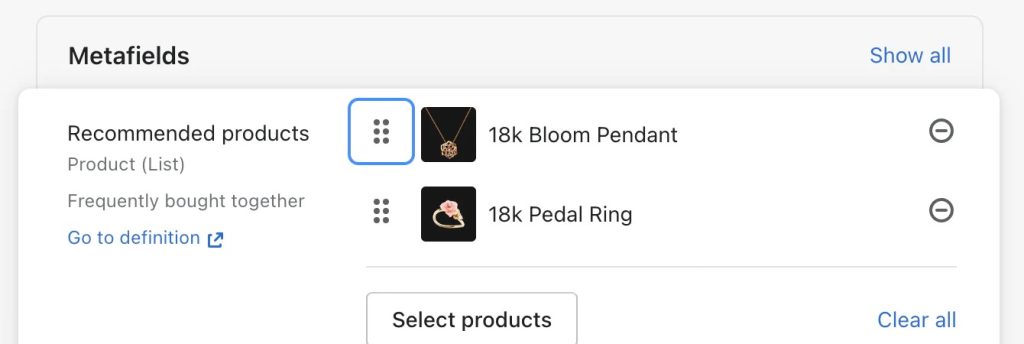
After the definition is successfully created, you can go to the part of your store where you want to add the metafield value. In this example, I created a Product Metafield, so I’ll go to a product and scroll down to Metafields section. Now I can add multiple value for the Recommended products metafield.
There are many powerful applications for metafield lists such as:
- Add a Frequently Bought Together section using Product reference metafields on Product page to upsell and cross-sell
- Include popular pages like policy page, size page with Page reference metafields
- Make a list of ingredients for a recipes with Text metafields
- Use File reference metafields to insert important files for customers to download.
Metafield Limit
When it was just released, there were only 100 metafield definitions that Shopify businesses could add. Recently, Shopify has extended the limit to 200.
For SMBs, we think this number should be enough. However, if you are running a megastore with a huge inventory, you may need a third-party app to store and manage your metafields.
How to use metafields in Shopify ?
Note: these instructions were demonstrated on Debut themes. The steps are the same for any other themes
Step 1: Create the metafield definition
To create metafield using Shopify configuration, use the following steps:
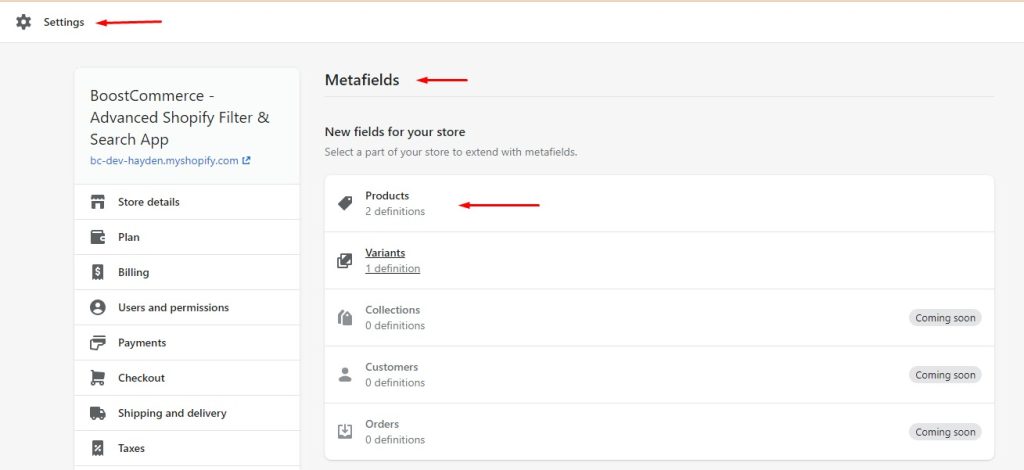
1. Go to Setting > Metafields
2. Choose Metafields type. In this guide, we will choose the “Products” metafields type for demonstration
3. Click Add Definition
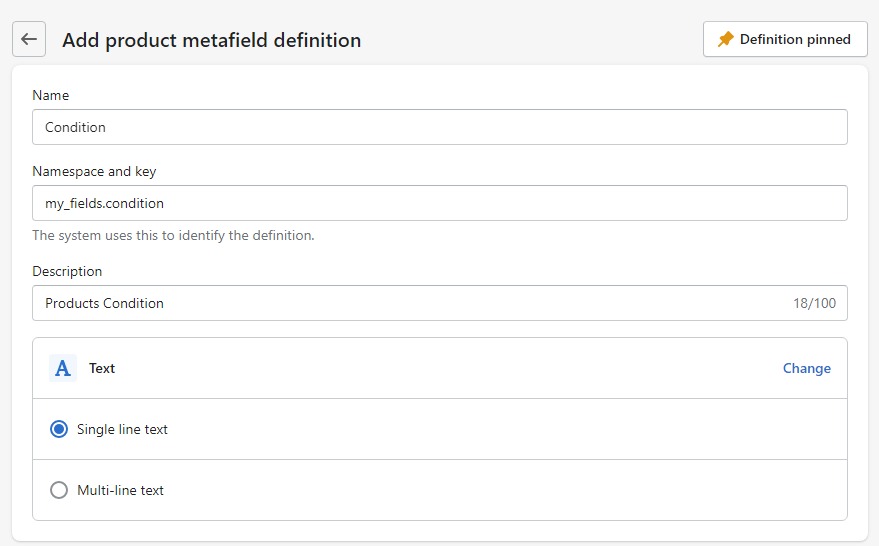
4. Fill in name, namespaces, key, and choose content type. Description is optional
Namespace & Key: as explained above, the namespace is like naming your folder, and key is the metafields name. Separate these 2 things by using a full stop – “.”
It doesn’t matter which name, namespace, or key you choose, it won’t affect anything. Its only job is to help you manage and differentiate from other metafields.
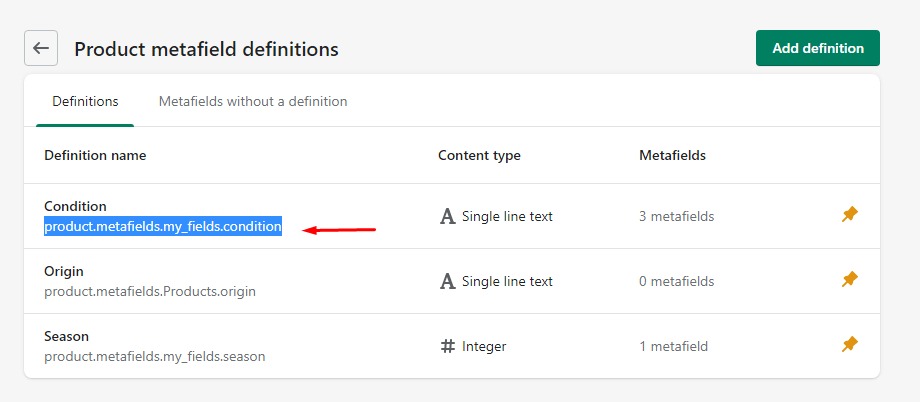
In the example below: we use “my_fields” as the namespace and “condition” as the key.
For the content type, it decides the format of the metafields’the value. In this example, we choose the “text” format. With each format, there are further options for you to configure, but it is optional.
5. Hit Save to successfully create one metafield definition.
Note:
- Shopify requires you to pin the metafield (top right corner in the image above) to make it work. When you create a new one, it’s pinned by default.
- If you use 3rd-party Shopify Metafield apps, you can create new metafields definitions right on the app’s dashboard.
Step 2: Add value to the metafield in the product setting
Now, you need to add value to the newly created metafields in each product. You can do it in 2 ways:
- Add metafields one by one
- Add metafields in bulk
Add metafields one by one
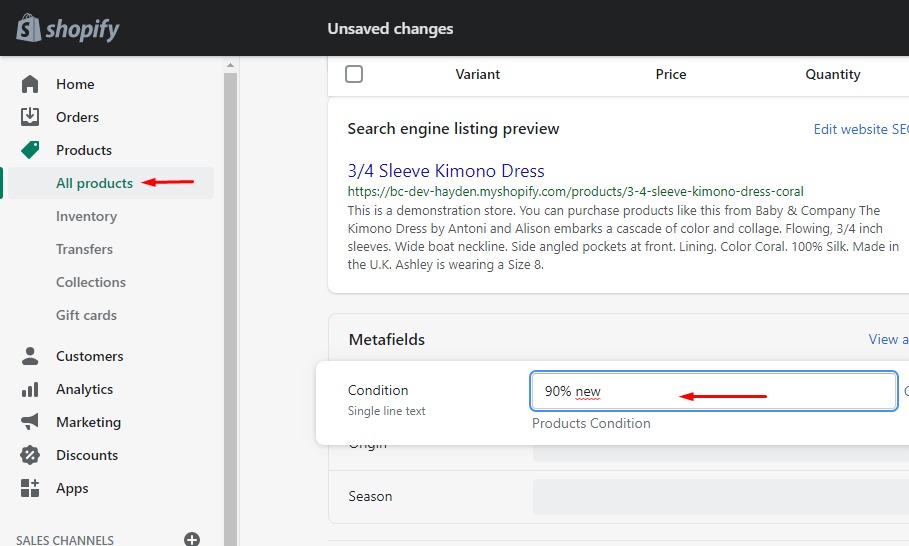
1. In Shopify admin, go to Products > All products > choose the products you want to add more information through metafields.
2. On the product setting page, scroll down to the “Metafields” section.
3. Add Value to the Metafields.
However, if you have thousands of products that need to add a metafield to, this method could be very time-consuming. Therefore, we will guide you through how to add metafields in bulk.
Add metafields in bulk
1. First, you need to type this URL format in your browser:
store-name.myshopify.com/admin/bulk?resource_name=Product&edit=metafields.{namespace}.{key}:{vaule_format}
You need to change {namespace}.{key}:{vaule_format} according to the metafields name space & key definition you want to edit. All of this information can be taken from the metafield definition you just made.
Continue with the example above, if we want to edit the metafield “Condition” in bulk, we have to enter the URL:
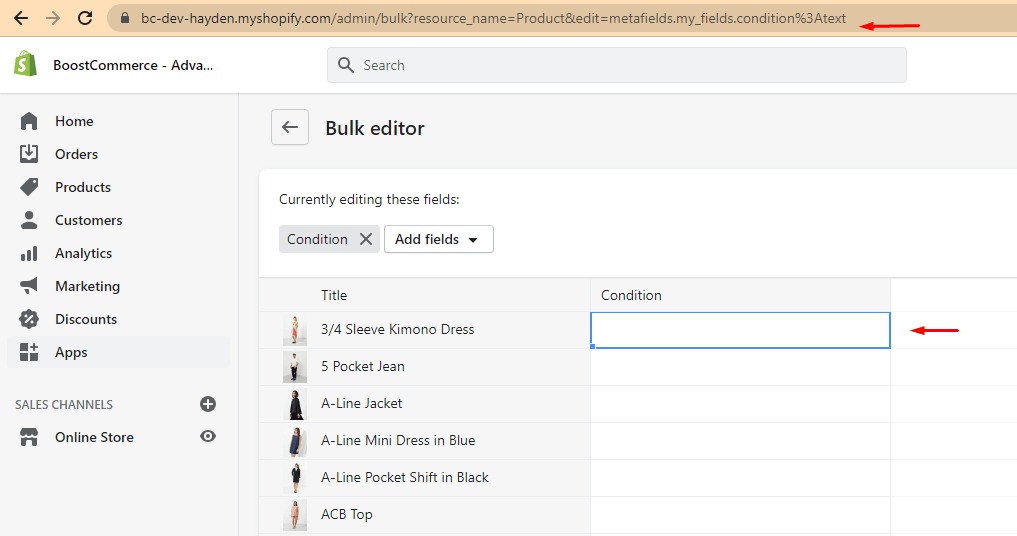
store-name.myshopify.com/admin/bulk?resource_name=Product&edit=metafields.my_fields.condition:text
2. After entering the URL, you will see the bulk editor screen (which is not accessible through the traditional way), now you can add values to multiple products at the same time.
Although you still have to fill each value for each product, it’s much faster than going to each product and adding one by one.
Alternative option: you could consider using a Shopify App to bulk edit Metafields.
For example, Metafields Guru will help you edit the first 1000 products for free. However, bulk editing is a premium feature in every app, so you need to consider the cost and benefit to your business before deciding to buy one.
If you have more than 1000 products or need to edit metafields in bulk multiple times, then using these an app is more reasonable.
Step 3: Display Metafields on your Shopify Store
With the release of Online Store 2.0, Shopify users now have 2 ways of showing metafields in the front-end:
- Add code to themes (work with all theme versions)
- Use theme editors (only available for OS 2.0 themes)
Following the example below, we will show you how to show metafields in product pages
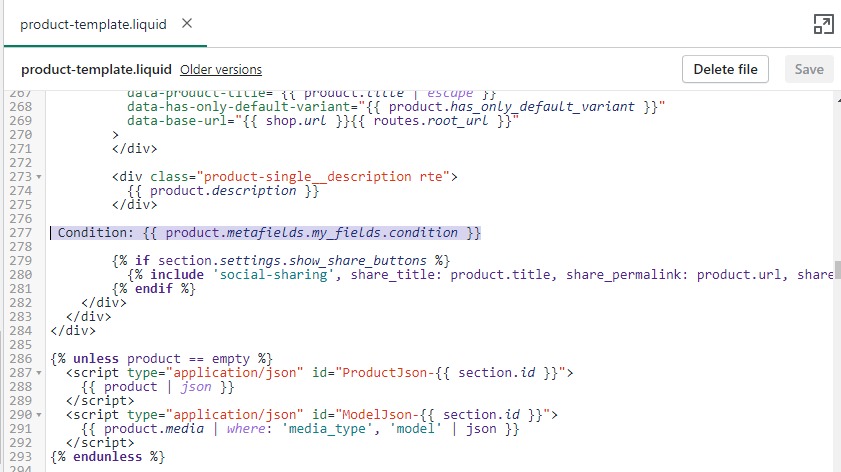
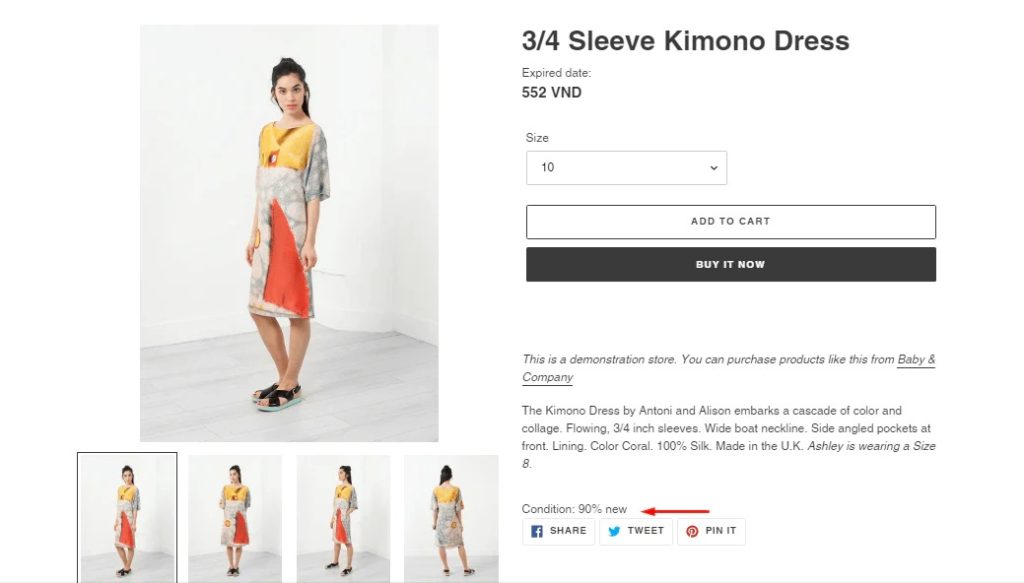
Showing product metafields by adding code to themes
1. Go back to Metafields Setting, and copy/remembers this line, we will use it soon.
Showing product metafields by using themes editors
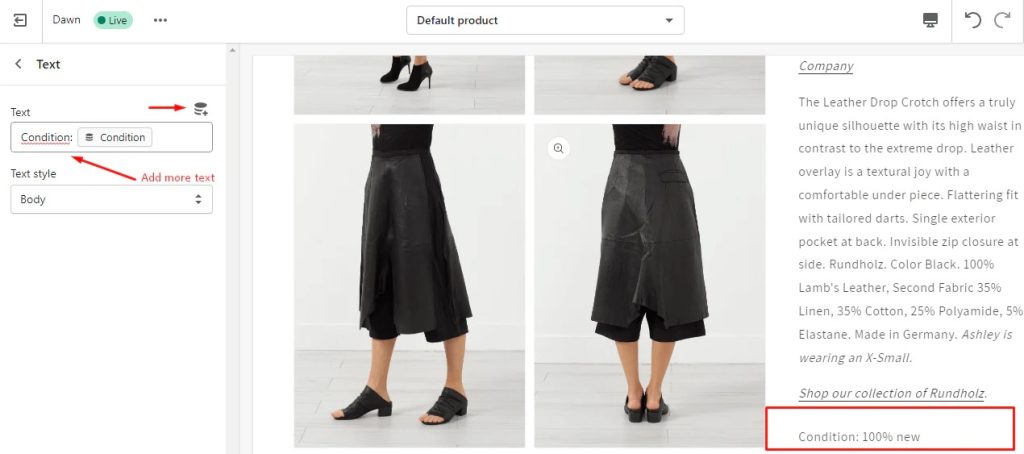
Since this method only works for OS 2.0 themes, we will demonstrate it on the Dawn theme.
1. Go to Online Store > Products > Themes > In the current themes, choose Customize
2. Select Default Products Page or Product page template
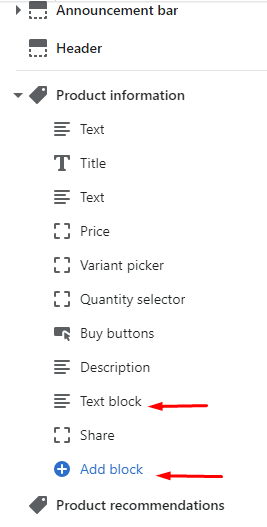
3. On the control panel on the left, in the Product Information panel > Add a Text block. You can drag the block to the location you want.
4. Click on the Text block > click on the icon > add metafields.
Note: You need to add additional text before the block metafield to give the metafield a title.
5. Hit Save and you are done. Follow the same steps to add another metafield..
Shopify metafields in practical use
Show additional information in an appealing style
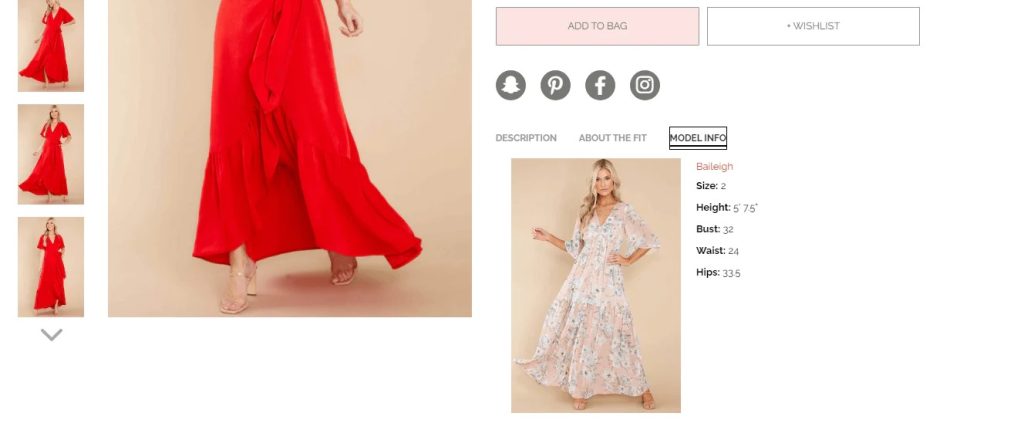
This is a core functionality of meta fields, a port to help shop owners add information that doesn’t have a place in Shopify to the product page. With the help of experienced web developers, you can have an appealing interface to display all information like showing in tabs, image slides, …etc.
This will give customers a better shopping experience. And better shopping experience always leads to a better conversion rate.
If you enjoyed this, you might also enjoy these post


