Add Facebook Messenger Chat to Shopify Store in 7 Easy Steps
If you have been keeping up with my blog posts you will know that I always stress about having a live chat feature on your store for multiple reasons. A common question I am asked is how do I add facebook messenger chat to shopify Store? the answer is… yes, you absolutely can and it is 100% free. Within the Shopify back-end, it allows you to have the option of setting up a Facebook Messenger sales channel, which is good but not great. The reason I don’t find this option to be a great one is the user experience for visitors is not the best since it takes you away from the website when you click on it.
To install the Facebook Messenger plugin on your store follow these easy steps.
- Go to your store’s Facebook page ( you must be an admin or owner on the page).
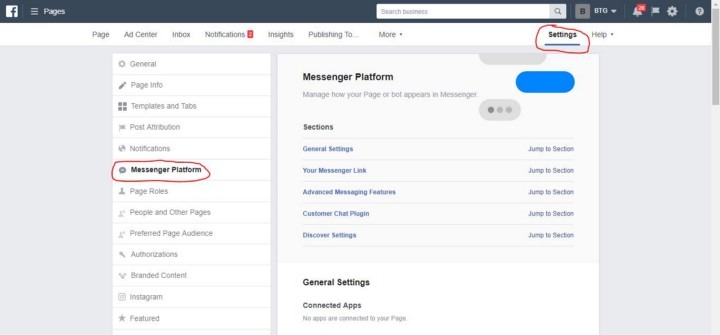
- Go to your settings and click “messenger platform”.
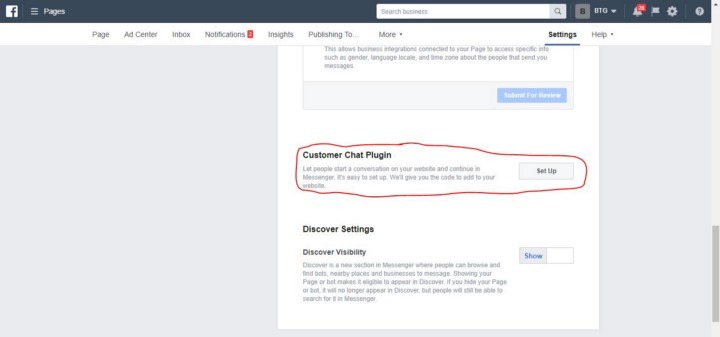
3. Scroll down to the bottom and under “customer chat plugin” click set up.
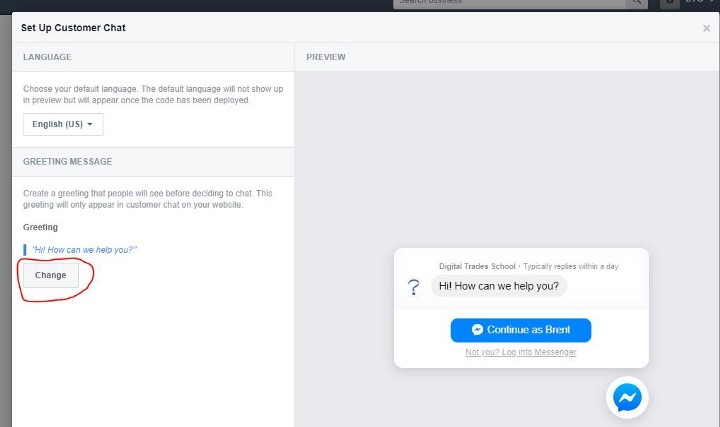
4. Go through the setup wizard, you can change the greeting message and also the colors of the widget.
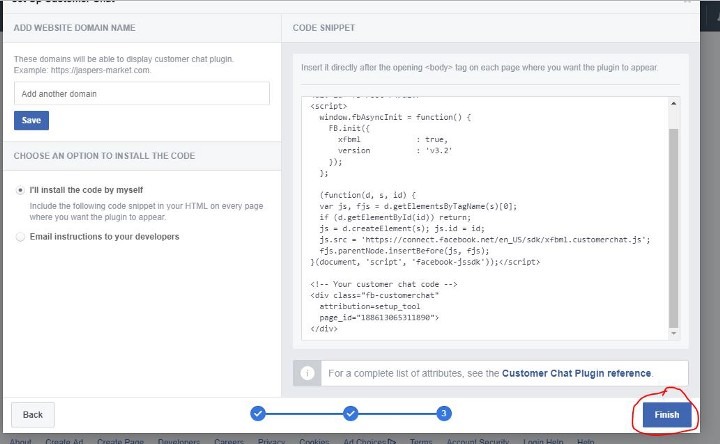
5. When you get to the end of the set up you will see this page, make sure to add your website to the domains list and then take that code and copy it.
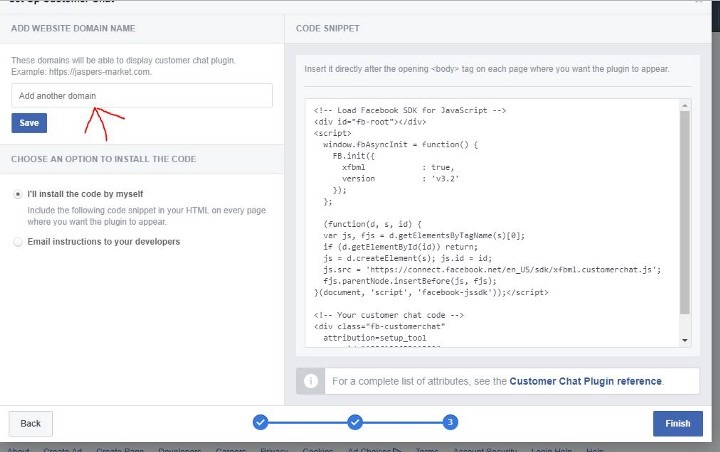
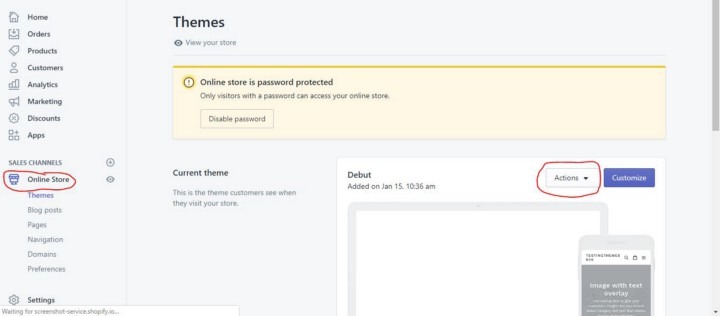
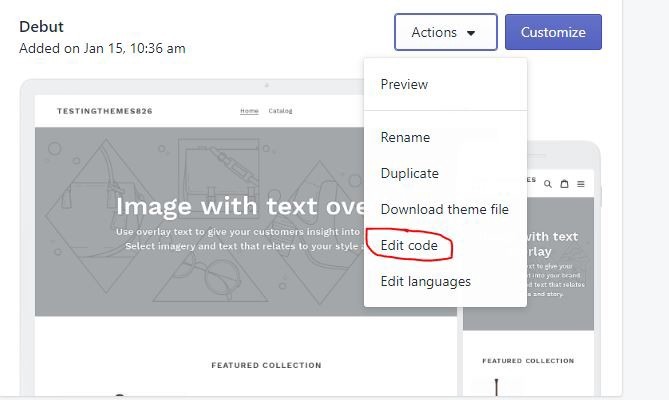
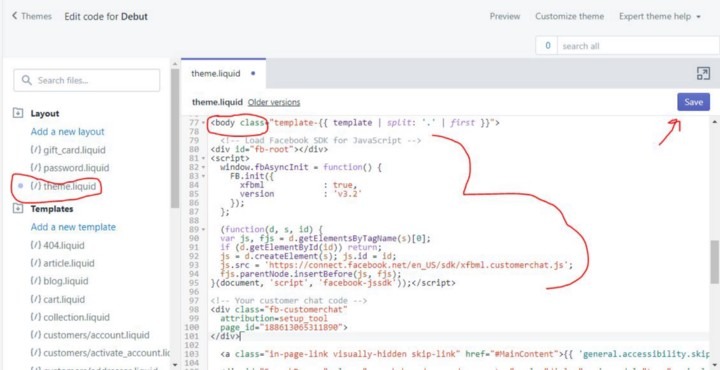
6. Once you have the code copied go to your Shopify Backend, go to the Online store, then click themes, then click the action button, and in the drop-down select edit code. Find the theme. liquid template and paste the code you just copied right below the <body> tag and then click save.
7. Once you have done that go back to your Facebook page and click finish and that’s it. You will not have the Facebook chat app installed on your Shopify theme and it will function right on the page and will not take you anywhere.
I hope this document helps, if anyone has any troubles or has questions about setting this up please just let me know by leaving a comment
If you enjoyed this, you might also enjoy these post
How to Submit Bulk Images From Shopify to Google Indexing
How to Create Welcome Email Series For Shopify Using Klaviyo
