Shopify tags are essential to managing your growing product line and store; however, we understand that they may also seem confusing initially.
As your store grows, you may find that many things can take a twist out of your control. So, implementing a sound system for your online shop beforehand can help you eliminate hassles and save time.
For new merchants especially, using the Shopify tags effectively such as adding to specific posts, removing, searching, filtering, and linking to multiple items or collections might be a little overwhelming.
No worries, we’ve got you covered. Let’s begin!
contents:
- What are Shopify Tags?
- What are the Benefits of Using Tags?
- What are the Different Types of Shopify Tags?
-
-
-
-
-
-
-
-
-
-
- Product
- Transfer
- Customer
- Blog Post
- Order
- Draft Order
-
-
-
-
-
-
-
-
-
- When to Use Tags on Shopify?
- How to Add Tags on Shopify?
- How to Remove Shopify Tags?
- How to Automate Tags on Shopify?
- The Effect of Shopify Tags on SEO
- Organize Your Products with Shopify Tags
- Conclusion
- Frequently Asked Questions
- Check These Out!
Shopify tag is a feature that classifies various items such as products, customer data, orders, transfers, returns, and even blog posts from your Shopify store.
Shopify tags aren’t displayed to customers, but merchants can use them to categorize products in the store and improve search results.
For instance, once your summer sale campaign is over, you can search for your products with the “Summer sale” tag you created earlier on your Products page and use a bulk action to hide them from search results.
Tags are searchable keywords associated with store products or services that streamline the purchasing process for both sellers and buyers.
Adding tags to your e-commerce store allows customers to search and filter your products more efficiently.
Furthermore, tags make it easier for merchants to create automated collections, which help to stay organized while using Shopify.
With Shopify, you can create a custom set of tags for each section of your online store.
However, creating a tag in one section will not carry over to other sections that use tags.
Here are all the types of tags in your Shopify store you can use to organize your products and services:
1. Product
You can insert and remove product tags and view them all on your product detail page. This Shopify tag helps you:
- Organize and group products into different categories.
- Describe a product’s features, color, season, price range, or any other search term that your customers use.
2. Transfer
With a transfer tag, you can:
- Add and remove tags from a specific transfer’s details page
- Filter transfers by tag on the Transfers page.
3. Customer
You can see all the customer tags from any customer details page. With this type, you can:
- Add and remove tags on the details page of a specific customer.
- Create marketing campaigns or personalized communications segments.
- Schedule emails and SMS to send customers who have been tagged with a particular action
4. Blog Post
You can add and remove blog post tags for a specific blog post. Also, you can:
- Filter your e-commerce blog posts by tagging them on the blog posts page.
5. Order
You can add and remove tags for specific orders on its details page. This tag helps you:
- Group orders with similar expected delivery dates, delivery status, fulfillment regions, and more.
- Categorize orders. This way, your shipping and logistics team can stay on top of all fulfillment requirements.
6. Draft Order
You can add and remove draft order tags on a specific draft order’s details page. Plus, you can:
- Create an order from a draft order, the tags associated with the draft order are carried over to the order.
It’s important to note that the number of tags you can add to your products is unlimited if you’re a Shopify Plus user. However, you can only add 250 tags per product, customer, order, and other items if you don’t have a Plus plan.
The first step towards knowing when to use tags is to understand what they do for your Shopify store.
A tag is a feature that allows you to categorize the products, customers, and information on your e-commerce store to improve your efficiency.
Depending on their type, each Shopify tag can be used for a particular purpose.
Shopify tags help you organize and store data so you can make sense of it.
You can have a clearer picture of your website operations if you logically organize your products, orders, and customers.
For example, to specify information for your team to respond to inquiries about specific draft orders, you can create custom tags, change the name of a tag, add filters to a section, and more.
It is even better if each order has information about its shipping destination, delivery time, and warehouse location. Therefore, you won’t have to worry about delays, cancellations, or returns.
Having a near-instant, consistent view of every order’s essential attributes will increase efficiency and minimize errors, thereby optimizing fulfillment.
Additionally, if you tag your products with keywords your customers are searching for, you are guaranteed to improve their search experience and, by extension, your Shopify SEO.
Aside from that, tags can be used to enhance the marketing and communication tactics of e-commerce websites.
After learning the different tags above, you know that Shopify allows you to add tags as you create or edit products, transfers, customers, orders, draft orders, or blog posts.
Now, here are the simple steps on how to add tags to the Shopify store:
Step One:
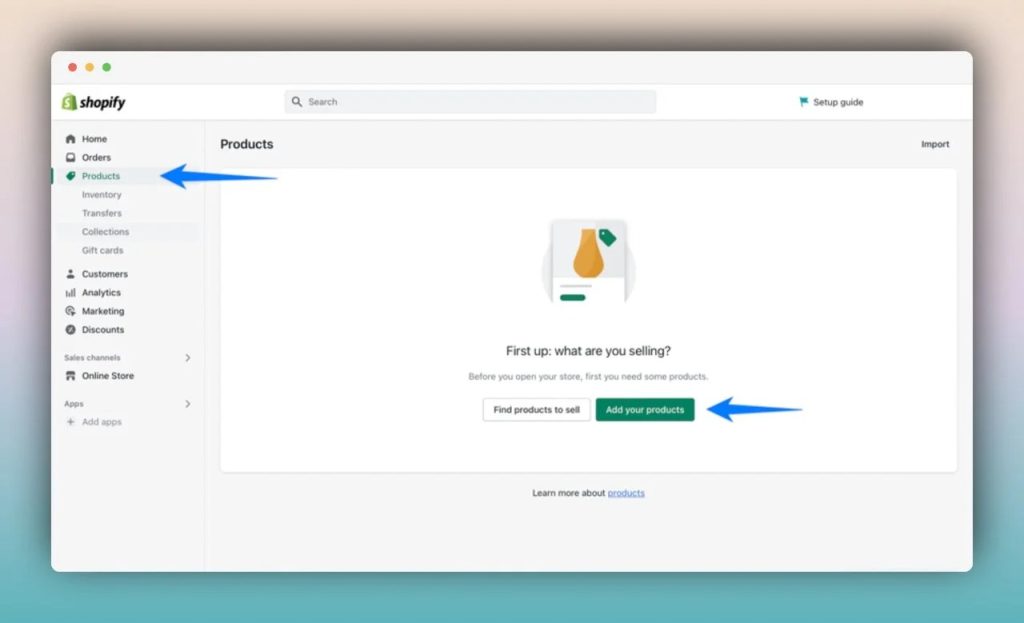
Go to your Shopify admin and pick one type of Shopify tag. Here to show you step by step, we choose the Products tag.
Step Two:
Then, click on the specific product you want to edit or add a new product to your product list.
Step Three:
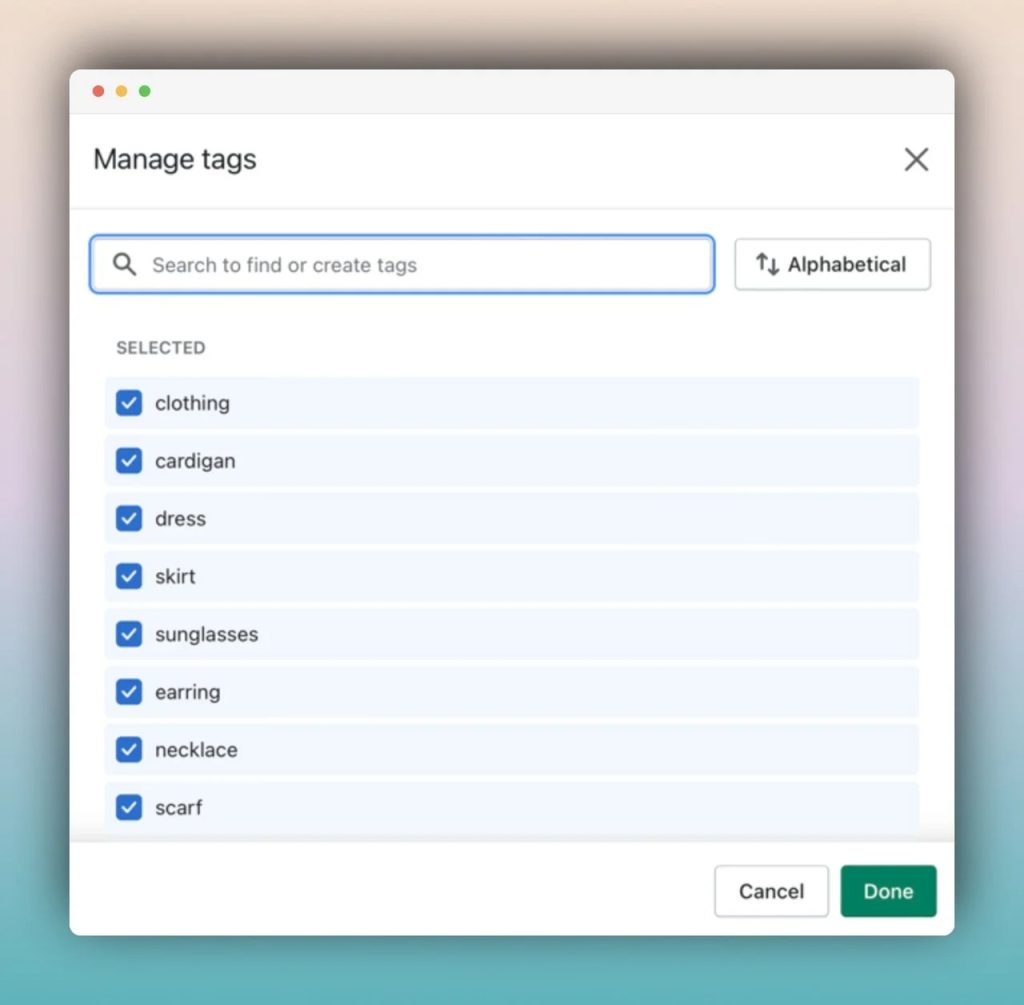
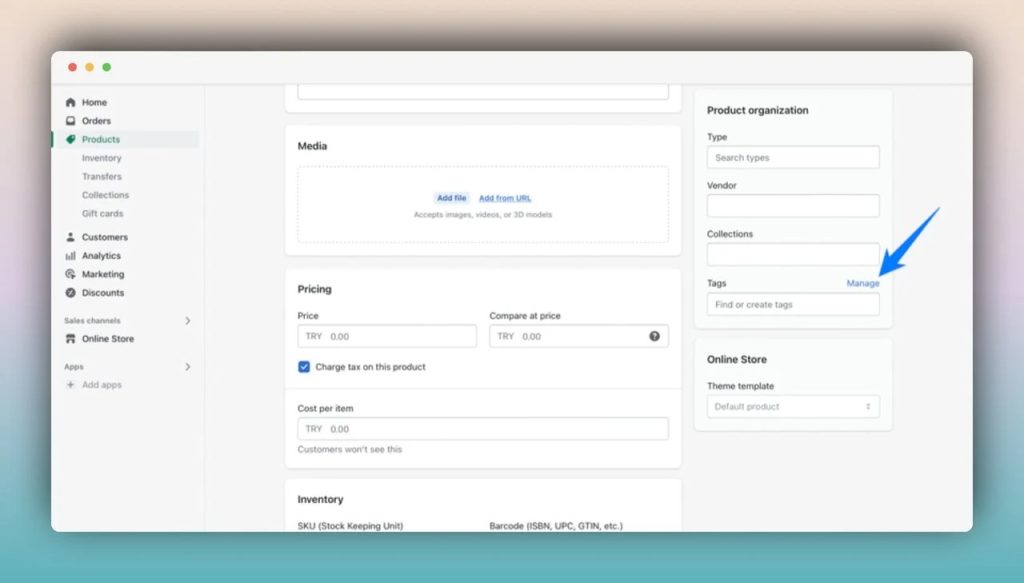
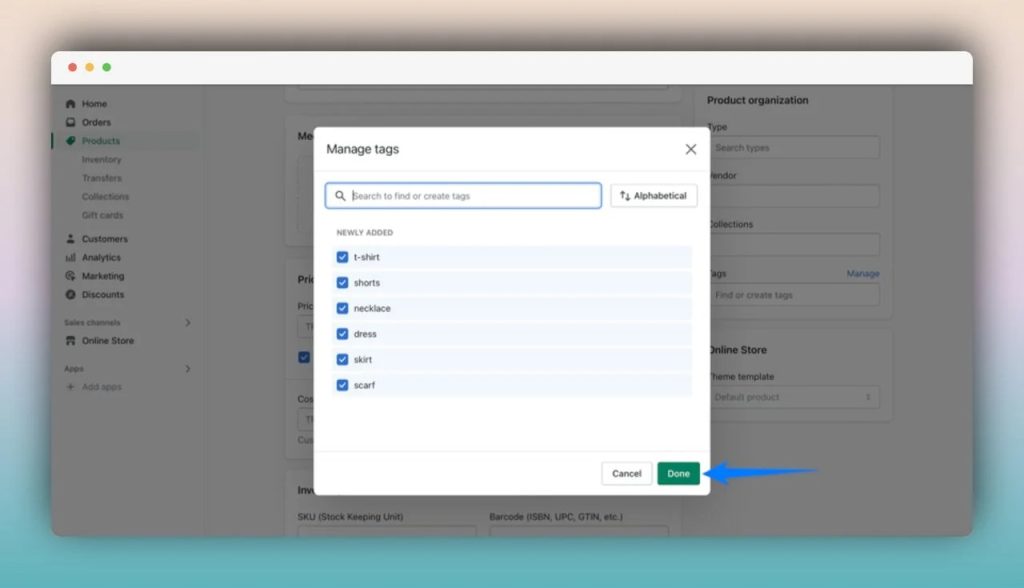
Enter the tag name you want to add in the Tags section or choose an existing tag from the Tags list in View all tags. To separate tags, use a comma.
In case your name tag is a new one, it will be automatically saved.
Step Four:
Lastly, click Done to save your changes. That’s all it takes to create tags on Shopify.
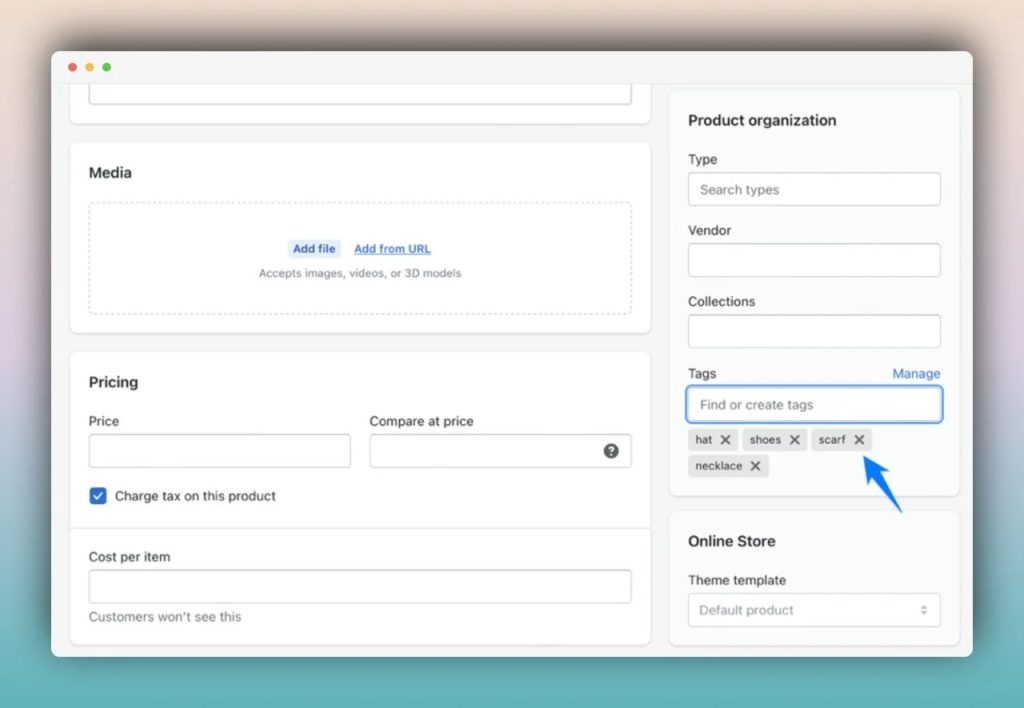
Just like the steps above for adding a tag on your Shopify store, you can go to the Shopify admin -> Products page and choose the specific product you want to remove its tag.
The next step is to scroll down to the Organization section and click the x next to the tag you want to remove.
In this case, the tag will only be removed from the product page you open but will not affect any other product pages.
Automation makes everything easier, and adding tags on Shopify is no exception.
For instance, by using dropdown boxes, checkboxes, or radio buttons, you can tag customers with the value they select.
Moreover, you can use conditional form logic (called “Rules” in-app) to apply tags based on the conditions you define.
Remember that you can only add or remove tags manually via the Shopify admin panel.
If you want to bulk edit your tags and automate the responses, there’s no native way in Shopify to do that.
However, you can auto-tag your products in Shopify using smart tag apps to rebuild workflows or create a new one and tailor it to your specific needs by utilizing hundreds of customizable data points.
As a matter of fact, we can say that product tags have little effect on SEO. Their main function is to help you organize products within your Shopify stores.
However, there are some cases when they can affect your SEO. For example, if your themes allow you to list your product tags on your own product page, they will be the page content that Google reads.
It means you should be careful because those tags account for a big part of the page’s content, Google may suspect that you are engaging in keyword stuffing, for which you may be penalized.
Another thing we need to mention is the duplicate content issue. Individual product tags on Shopify have their own URL so it might be a bad idea to use categories and brands in your product tags as they are present as separate pages on your store website.
This situation will cause two identical pages to appear in the eyes of Google bots and decrease their chance of ranking well. However, there is a solution to prevent this from happening.
You can tell Google (or search engines in general) which page is the original by indexing them using a canonical tag (rel=”canonical”). That helps the bots crawl only one of the pages, and users will be able to find additional products on your tagged collections page.
You can also try creating collections using tags. Creating collections is good for sales as they offer a selection of products.
Plus, if done right, the link and folder structures of your collections help search engines understand what kind of queries your product pages and categories are relevant for.
A product tag may be used for various reasons; here are some ideas and best practices for using product tags on Shopify.
Let’s say you want to promote specific items for a promotional or seasonal campaign and put discounts on them.
Product tags are the perfect solution to organize your plan and show product badges in every store section.
When adding product tags to your products, use promotion types instead of product features.
This helps you have more flexibility and can easily reuse these tags.
Moreover, you can save time by creating tags based on delivery dates, zip codes, and fulfillment zones and provide customers with an effortless shopping experience.
Using tags, you can automatically send emails to customers who have partially completed, abandoned, or canceled orders.
Conclusion
So are you excited about Shopify tags yet?
We hope we’ve given you thorough guidance about this feature on Shopify. Whether you’re just starting out, or have been using the platform for a while now, there’s always something new to try. And Shopify tags are definitely one worth learning.
To discover more about what else Shopify has to offer, check out the rest of our resources.
Before you leave, how do you utilize Shopify tags? Do you think that they are functional?
Meet me in the comments section below!
Frequently Asked Questions
It depends on the number of your products. You may not need many if you don’t have so many products. If you have so many products to keep track of using tags, create a tag format for yourself. Note that each product can have up to 250 tags applied and remember the keyword stuffing issue mentioned in the SEO section above.
2. What are Product Tag Examples?
Let’s say you are selling clothing items and you need to create tags for t-shirts, you can go for “t-shirt”, “linen”, “V-neck”, “pocket t-shirt” etc.
If you enjoyed this, you might also enjoy these post
