Recently I was tasked with doing a security review of our Shopify integration and I wanted to go all the way in by building a Serverless Shopify App Using AWS Chalice and Python. It proved to be quite a challenge, and I am sharing my learnings and code here with the hope of helping anyone else trying to figure this out.
What are Shopify Apps
Shopify, as you might be aware, is a popular E-Commerce platform. Shopify Apps are standalone web applications that integrate with Shopify through OAuth to extend its functionality or to provide custom behavior.
The idea of extending a platform with web apps sounds great but I did not want to set up my own server infrastructure to run these apps. This lends perfectly to serverless deployment, but managing a serverless deployment with all its configurations and API endpoints can be a hassle. That’s where AWS Chalice comes into the picture.
What is AWS Chalice
Chalice is a framework for writing serverless applications using Python and AWS Lambda. You can completely manage your serverless deployments with a command line tool and it also includes a local development environment. Because Chalice uses local files, you can use Git to version control all your changes. I’ve linked my GitHub repo at the bottom of this post that you may use as a starting point for your own apps.
Other Prerequisites
Shopify Partner Account: To create and deploy Shopify applications you need a Shopify Partner Account and a Development Store, you can do that on the Shopify Partner Page. They have documented it well so I am not going to go into a lot of detail in this post, feel free to reach out if you are stuck or need help.
AWS: As the title implies, you will also need an AWS account, what I like about using serverless features is that you can start for free and pay for what you use.
Docker: If you want to follow my guide you will need Docker installed locally on your computer. Supposedly VirtualEnv can be used as well, however, I prefer the complete control I get with Docker.
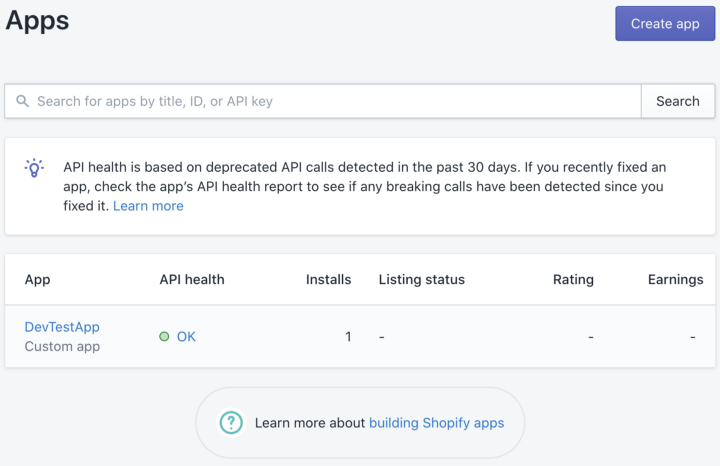
Step 1: Create an App in Shopify
Note that creating the App in Shopify just defines sort of an entry point, you must next write the actual code for the application and deploy it on the web so Shopify can integrate with it. As discussed above we will be writing our app code in Python and deploying it on AWS Lambda using the Chalice framework. To get going we need to install Chalice on our local development environment and configure AWS so we can deploy it when we are ready.
Step 2. Setup Local Development Environment
We need Python, PIP and Chalice installed to get started. Depending on your operating system this can be done as explained on the Getting Started with Chalice page. I have already setup everything using Docker so you can just clone my repo and run the chalice-env script to get going.
% git clone https://github.com/naveed125/shopify-serverless-app.git
Cloning into 'shopify-serverless-app'...
remote: Enumerating objects: 36, done.
remote: Counting objects: 100% (36/36), done.
remote: Compressing objects: 100% (27/27), done.
remote: Total 36 (delta 6), reused 31 (delta 5), pack-reused 0
Unpacking objects: 100% (36/36), done.% cd shopify-serverless-app
You will now need to create two configuration files.
- Create a
./aws/configfile with your AWS credentials. I’ve included a template at./aws/config.tmplthat you can start with. Here is what the file should look like:
[default]
aws_access_key_id=YOUR_ACCESS_KEY_ID
aws_secret_access_key=YOUR_SECRET_ACCESS_KEY
region=YOUR_REGION
I suggest creating a new IAM user for this exercise, watch this video by the AWS team if you are not sure.
2. Create the Chalice config file. You can start by copying app/.chalice/config.json.tmpl from my repo into app/.chalice/config. Here is what it should look like:
{
  "version": "2.0",
  "app_name": "app",
  "stages": {
    "dev": {
      "api_gateway_stage": "api",
      "environment_variables": {
        "SHOPIFY_API_KEY": "YOUR APP KEY HERE",
        "SHOPIFY_API_SECRET": "YOUR APP SECRET HERE",
        "AWS_API_BASE_URL": "YOUR APP AWS BASE URL"
      }
    }
  }
}
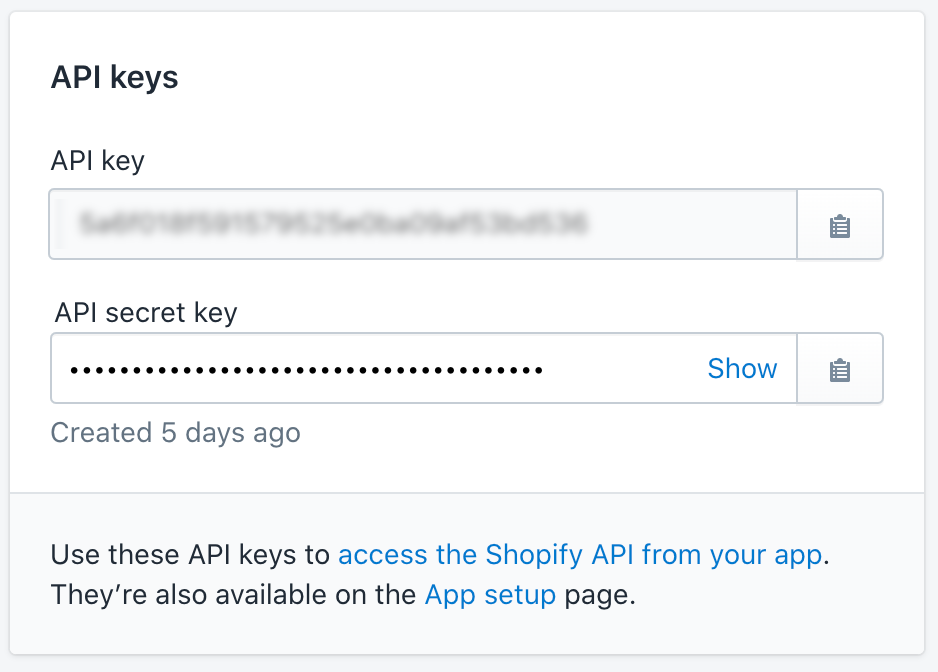
You can get the Shopify App Key and Secret from the Shopify Partner Dashboard on the App page as shown below. We’ll get the AWS_API_BASE_URL after deploying our app to AWS.
It is now time to start our Docker container with everything we need. Use the chalice-env script included in my repo to do so as I am showing below:
% ./chalice-env
Sending build context to Docker daemon  171.5kB
Step 1/5 : FROM python:3.8-slim-buster
 ---> 9d84edf35a0a
Step 2/5 : WORKDIR /app
 ---> Using cache
 ---> f33a7bc64917
Step 3/5 : COPY app /app
 ---> 167e6a39a672
Step 4/5 : COPY aws/config /root/.aws/config
 ---> d3023b0e3cd5
Step 5/5 : RUN pip install     chalice     httpie
 ---> Running in 1544f2b62117
Collecting chalice
...
 ---> bf6023df9a24
Successfully built bf6023df9a24
Successfully tagged shopify_serverless_app:latest
root@44434b3339a2:/app#
You are now ready to do your work. Try running the local Chalice instance and hitting it with Httpie that’s included in the Dockerfile. Httpie is just a nicer alternative to curl and I’ve included in the Dockerfile:
# chalice local &
Serving on http://127.0.0.1:8000# http localhost:8000
127.0.0.1 - - [28/Jun/2020 21:39:12] "GET / HTTP/1.1" 200 -
HTTP/1.1 200 OK
Content-Length: 9
Content-Type: text/plain
Date: Sun, 28 Jun 2020 21:39:12 GMT
Server: BaseHTTP/0.6 Python/3.8.3STATUS OK
Step 3: Implement Required End-Points in your App
We now need to code two endpoints in your Python app to make Shopify OAuth work. Read the full Shopify OAuth guide before continuing. Namely, our app needs the following end-points:
- Ask for Permission
- Confirm Install and Retrieve the Access Token
Checkout app/app.py in my repo to see how it works.
Step 4: Deploy your Chalice App to AWS
We are ready to deploy our code to AWS Lambda, but first, we need to make sure that Chalice has permission to do so. I did not find good documentation on this and others have found this to be a pain point as well.
Following is the AWS policy that worked for me, it is a bit broad, so don’t use it for production.
{
    "Version": "2012-10-17",
    "Statement": [
        {
            "Sid": "VisualEditor0",
            "Effect": "Allow",
            "Action": [
                "apigateway:DELETE",
                "apigateway:PUT",
                "apigateway:PATCH",
                "apigateway:POST",
                "apigateway:GET"
            ],
            "Resource": "arn:aws:apigateway:*::*"
        },
        {
            "Sid": "VisualEditor1",
            "Effect": "Allow",
            "Action": [
                "iam:GetRole",
                "iam:PassRole",
                "iam:DetachRolePolicy",
                "iam:DeleteRolePolicy",
                "lambda:*",
                "iam:CreateRole",
                "iam:DeleteRole",
                "iam:AttachRolePolicy",
                "iam:PutRolePolicy",
                "iam:ListRolePolicies"
            ],
            "Resource": "*"
        }
    ]
}
I’ve included this in aws/aws-policy.tmpl as a template. You need to set this up in the AWS Dashboard, once done, you can deploy your code to AWS as shown here:
# chalice deploy
Creating deployment package.
Updating policy for IAM role: app-dev
Updating lambda function: app-dev
Updating rest API
Resources deployed:
  - Lambda ARN: arn:aws:lambda:XXXXXX:XXXXXXXXXXX:function:app-dev
  - Rest API URL: https://XXXXXXXXXXX.execute-api.XXXXXXXX.amazonaws.com/api/
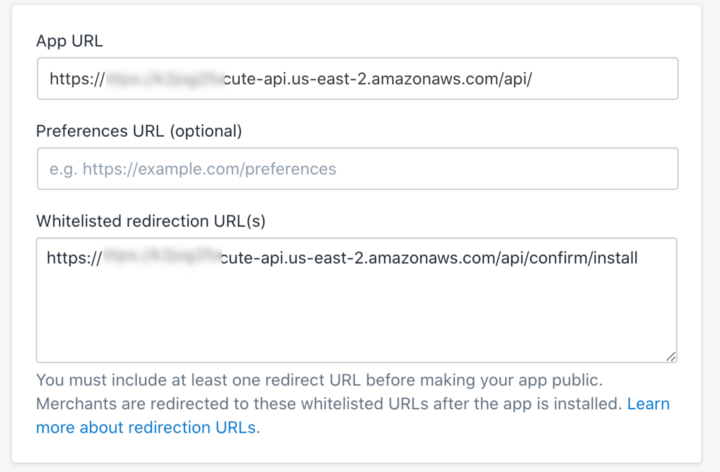
Step 5: Configure the App in Shopify to use the AWS end-point
The last few steps involve updating the App in Shopify Dashboard to use your new endpoint as shown here:
Step 6: Update Your Store to use the new App
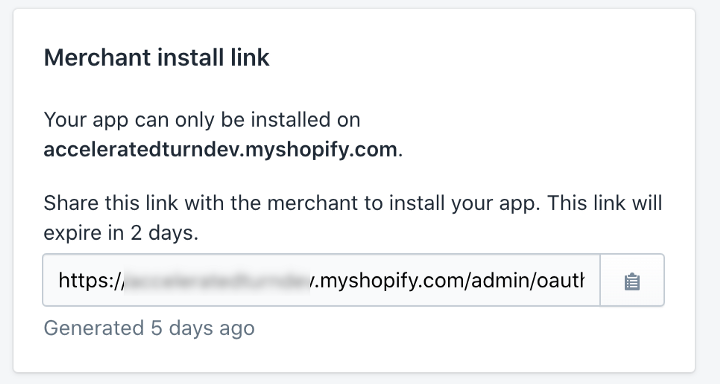
Our app is pretty much ready, copy and paste the “Merchant Install link” into your browser and complete the integration.
At this point, you should see the Installed app in your Store Dashboard and you can extend it further to respond to different Shopify events.
If you enjoyed this post, I’d be very grateful if you’d help it spread by emailing it to a friend or sharing it on Twitter or Facebook. Thank you!
you might also enjoy these posts
